
1. Introducere
This manual provides detailed instructions for the safe and efficient installation, operation, and maintenance of your RAGGIE RG-PT30 MPPT Solar Charge Controller. Please read this manual thoroughly before attempting any installation or operation to ensure optimal performance and longevity of the device.
2. Instrucțiuni de siguranță
- Ensure all connections are correct and secure before applying power. Incorrect wiring can damage the controller and connected devices.
- Always connect the battery first, then the solar panel, and finally the load. Disconnect in the reverse order: load, then solar panel, then battery.
- Nu dezasamblați și nu încercați să reparați singur controlerul. Apelați la personal calificat pentru service.
- Instalați controlerul într-o zonă bine ventilată, ferită de lumina directă a soarelui, temperaturi ridicate și umiditate.
- Use appropriate circuit breakers or fuses for the battery and solar panel circuits.
- Wear protective eyewear when working with batteries.
3. Produs terminatview
The RAGGIE RG-PT30 is an advanced Maximum Power Point Tracking (MPPT) solar charge controller designed to optimize the power harvest from your solar panels and efficiently charge your battery bank. It supports 12V and 24V battery systems and features a 30A charging capacity, an intuitive LED display, and multiple USB output ports for charging external devices.
3.1 Caracteristici cheie
- MPPT (Maximum Power Point Tracking) Technology for enhanced charging efficiency.
- Volumul sistemului automat de 12V/24Vtage recunoaștere.
- 30A maximum charge current.
- LED screen display for real-time monitoring of input, battery, and output status.
- Four 5V 2A USB output ports for device charging.
- Comprehensive electronic protection functions.
3.2 Identificarea componentelor

Figura 1: Față View of the RAGGIE RG-PT30 Controller. This image shows the front panel of the solar charge controller, featuring the LED display at the top, two control buttons (MENU and POWER) below the display, and four 5V 2A USB output ports at the bottom right. The main terminals for solar input, battery, and load are located at the very bottom.
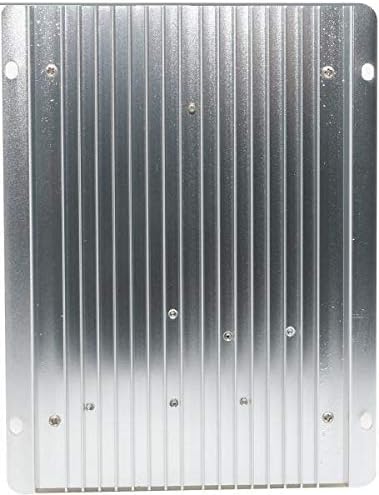
Figura 2: Spate View of the RAGGIE RG-PT30 Controller. This image displays the rear side of the solar charge controller, characterized by its metallic heat sink fins. These fins are designed to dissipate heat generated during operation, ensuring the controller maintains optimal temperature and performance.
4. Configurare și instalare
4.1 Montarea controlerului
- Alegeți un loc uscat, bine ventilat, ferit de lumina directă a soarelui și de umiditate.
- Mount the controller vertically on a non-flammable surface to allow for proper heat dissipation.
- Ensure there is sufficient clearance around the controller for air circulation.
4.2 Conexiuni de cablare
Follow the connection order strictly to prevent damage to the controller or system components. Use appropriate wire gauges for your system's current and distance.
- Conectați bateria: Conectați bornele pozitiv și negativ ale bateriei la bornele corespunzătoare ale bateriei de pe controler. Controlerul va detecta automat volumul sistemului.tage (12V sau 24V).
- Conectați panoul solar: Connect the positive and negative terminals of the solar panel(s) to the corresponding solar input terminals on the controller.
- Conectați sarcina de curent continuu (opțional): Conectați bornele pozitive și negative ale sarcinii de curent continuu la bornele de sarcină corespunzătoare de pe controler.
Important: Ensure correct polarity for all connections. Reverse polarity can cause permanent damage.
5. Instrucțiuni de utilizare
5.1 afișaj LED
The LED screen provides real-time information about your solar system:
- INTRARE: Afișează volumultage and current from the solar panel.
- BATERIE: Afișează volumul baterieitage și curent de încărcare.
- IEȘIRE: Indicates the load voltage și curent.
5.2 Funcțiile butoanelor
- Butonul MENU: Press to cycle through different display parameters or enter settings mode.
- Butonul de pornire: Press to turn the DC load output ON/OFF. Long press may enter or exit certain settings.
5.3 Ieșire USB
The four 5V 2A USB ports can be used to charge compatible electronic devices. These ports are active when the controller is powered and the battery has sufficient charge.
6. Întreținere
- Inspecție regulată: Verificați periodic toate conexiunile cablurilor pentru strângere și coroziune.
- curatenie: Păstrați controlerul curat și fără praf și resturi. Folosiți o cârpă uscată pentru curățare.
- Ventilare: Ensure that the ventilation openings and heat sink fins are not obstructed.
- Verificare baterie: Regularly check the battery's state of charge and electrolyte level (for flooded batteries).
7. Depanare
| Problemă | Cauza posibila | Soluţie |
|---|---|---|
| Fără afișaj/controlerul nu pornește | Bateria nu este conectată sau are un volum scăzuttage; polaritate inversă. | Verificați conexiunile bateriei și voltage. Asigurați polaritatea corectă. |
| Bateria nu se încarcă | Solar panel not connected; low solar input; faulty panel/wiring. | Check solar panel connections. Verify solar panel output voltage. Ensure sufficient sunlight. |
| Sarcina nu funcționează | Load output turned off; overload; faulty load. | Press POWER button to turn on load. Reduce load. Check load device. |
| Porturile USB nu funcționează | Volumul baterieitage too low; controller fault. | Ensure battery is adequately charged. If problem persists, contact support. |
8. Specificații
| Parametru | Valoare |
|---|---|
| Model | RG-PT30 |
| Marca | RAGGIE |
| Mod de încărcare | MPPT (Urmărirea Punctului de Putere Maximă) |
| Sistem Voltage | 12V / 24V Auto Recognition |
| Curent de încărcare maxim | 30A |
| Tip de afișare | Ecran LED |
| Ieșire USB | 4 x 5V / 2A |
| ASIN | B07PC3TNCB |
| Data primului disponibil | 3 2019 martie |
9. Garanție și asistență
For warranty information or technical support, please refer to the documentation provided with your purchase or contact your retailer. Keep your purchase receipt as proof of purchase.
