
Introducere
This manual provides detailed instructions for the installation, operation, and maintenance of your Topvision Top808 8-Camera 1080P Lite DVR Security System. Please read this manual thoroughly before using the product to ensure proper setup and functionality. Keep this manual for future reference.
The Topvision Top808 system includes an 8-channel 1080P Lite DVR and eight 2MP 1080P bullet cameras, designed for both indoor and outdoor surveillance with night vision capabilities.
Conținutul pachetului
Verificați dacă toate articolele sunt prezente în colet:
- 1x Topvision XDVR-1008 8-Channel 1080P Lite DVR
- 8x Topvision TCB200 2MP 1080P Bullet Cameras (Indoor/Outdoor)
- 8x 18-meter BNC Video/Power Cables
- 1x Power Adapter for DVR
- 1x Power Adapter for Cameras
- 1x 8-way Power Splitter for Cameras
- 1 x mouse USB
- Manual de utilizare (acest document)
- Șuruburi și dopuri de montare pentru camere

Imagine: Pesteview of the Topvision Top808 security system kit, showing the DVR, eight cameras, cables, power adapters, and a mouse. Icons indicate 2MP resolution, indoor/outdoor use, mobile app compatibility, and night vision.
Configurare și instalare
1. Hard Drive Installation (Optional, Not Included)
The DVR requires a 3.5-inch SATA hard drive (up to 8TB, WD Purple recommended) for recording. If you plan to record video, install a hard drive before powering on the DVR.
- Deșurubați și scoateți capacul superior al DVR-ului.
- Connect the SATA data cable and power cable from the DVR to the hard drive.
- Fixați hard disk-ul pe carcasa DVR-ului folosind șuruburile furnizate.
- Puneți la loc capacul superior și fixați-l cu șuruburi.
2. Conectarea DVR-ului

Imagine: Față și spate views of the Topvision DVR, highlighting BNC video inputs, audio inputs/outputs, HDMI, VGA, LAN, and USB ports.
- Conectați camerele: Attach one end of each 18-meter BNC cable to a camera and the other end to a BNC video input port on the back of the DVR.
- Connect Power to Cameras: Connect the camera power cables to the 8-way power splitter, then connect the power splitter to the camera power adapter. Plug the adapter into a power outlet.
- Conectați monitorul: Connect a monitor to the DVR using either an HDMI or VGA cable (cables not included).
- Conectați mouse-ul: Conectați mouse-ul USB la unul dintre porturile USB ale DVR-ului.
- Conectare rețea (opțional): Pentru telecomandă viewConectați un cablu Ethernet de la portul LAN al DVR-ului la router.
- Pornirea DVR-ului: Connect the DVR power adapter to the DVR and then to a power outlet. The system will boot up.
3. Amplasarea camerei

Imagine: Prim-plan view of multiple Topvision 1080P bullet cameras, emphasizing their 2MP resolution and night vision capabilities for indoor/outdoor use.
- Mount cameras in desired locations, ensuring a clear field of view.
- The cameras are designed for both indoor and outdoor use.
- Adjust the camera angle and focus as needed after installation.
Instrucțiuni de operare
1. Expertul de configurare inițială
Upon first boot, the DVR will guide you through an initial setup wizard. Follow the on-screen prompts to:
- Set language, date, and time.
- Create an administrator password.
- Configure network settings (DHCP recommended for ease of use).
- Format the hard drive (if installed).
2. în direct View
After setup, the DVR will display the live view de la toate camerele conectate pe monitor. Puteți comuta între o singură cameră view, multi-camera view, and sequence display using the on-screen menu or mouse controls.
3. Înregistrare
The DVR supports continuous recording, scheduled recording, and motion-detection recording. Configure recording settings via the DVR's main menu:
- Du-te la Main Menu > Record > Record Schedule to set up recording times.
- Du-te la Meniu principal > Alarmă > Detectare mișcare to enable and configure motion detection for specific cameras.
4. Redare
Pentru a review inregistrat footage:
- Du-te la Main Menu > Playback.
- Select the date and time range, and the cameras you wish to view.
- Folosește comenzile de redare (redare, pauză, derulare rapidă înainte, derulare înapoi) pentru a naviga prin fișiere.tage.
5. Telecomanda Viewing (Aplicație mobilă)
To access your security system remotely via a smartphone or tablet:
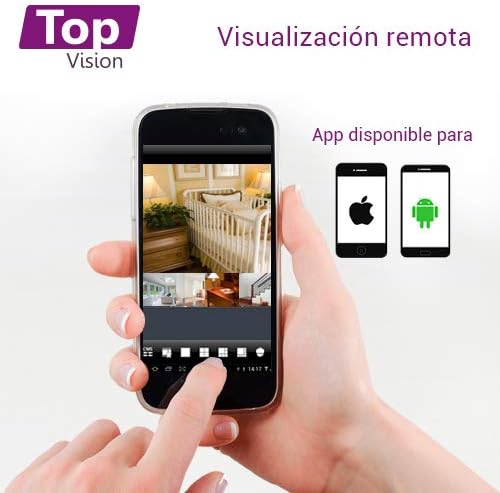
Image: A smartphone screen displaying live camera feeds, illustrating the remote viewing capability of the Topvision security system via a mobile application available for both Android and iOS.
- Ensure the DVR is connected to your network via an Ethernet cable.
- Download a compatible third-party surveillance app (e.g., XMEye, Danale, or similar apps recommended by Topvision support) from your device's app store (Android or iOS).
- Înregistrați un cont în aplicație.
- Add your DVR device to the app using its serial number or QR code (found in the DVR's network settings).
- Odată adăugat, puteți view live feeds, playback recordings, and receive alerts remotely.
Întreţinere
- curatenie: Gently wipe cameras and DVR with a soft, dry cloth. Avoid harsh chemicals.
- Actualizări firmware: Periodically check the Topvision website or contact support for available firmware updates to ensure optimal performance and security.
- Starea hard disk-ului: Monitor the hard drive status through the DVR's menu. Replace if errors are detected.
- Conexiuni prin cablu: Periodically inspect all cable connections for secure fit and signs of wear or damage.
Depanare
- Fără semnal video:
- Check all BNC cable connections between cameras and DVR.
- Ensure cameras are receiving power from the power adapter and splitter.
- Verify the monitor is correctly connected to the DVR via HDMI/VGA and is set to the correct input.
- DVR-ul nu înregistrează:
- Confirm a hard drive is installed and properly connected.
- Check if the hard drive has been formatted (Main Menu > HDD > HDD Manage).
- Verify recording schedules are configured correctly (Main Menu > Record > Record Schedule).
- Verificați starea hard disk-ului pentru erori sau capacitatea maximă.
- Telecomanda ViewNu funcționează:
- Ensure the DVR is connected to the internet via an Ethernet cable.
- Check network settings on the DVR (Main Menu > Network) to ensure it has an IP address.
- Verify the mobile app is correctly configured with the DVR's device ID.
- Check your router's firewall settings if connection issues persist.
- Calitate slabă a imaginii:
- Clean camera lenses if dirty.
- Asigurați o iluminare suficientă pentru o vizibilitate optimă pe timp de zi.
- For night vision, ensure no obstructions are blocking the infrared LEDs.
Specificații
| Componentă | Caietul de sarcini |
|---|---|
| DVR Model | XDVR-1008 |
| Intrare video | 8 Channels (BNC) + 1 IP Channel |
| Rezoluție video | 1080P Lite |
| Model de cameră | TCB200 |
| Rezoluția camerei | 2MP (1080P) |
| Obiectiv | 2.8 mm |
| Vedere de noapte | LED-uri cu infraroșu |
| Depozitare | Supports 1x SATA HDD up to 8TB (not included) |
| Ieșire video | HDMI, VGA (simultaneous) |
| Conectivitate | Wired (Ethernet for network) |
| Dimensions (DVR) | 30 x 25 x 7 cm |
| Weight (System) | 5.85 kg |
Informații despre garanție
Topvision products are covered by a limited warranty. Please refer to the warranty card included with your product or visit the official Topvision webConsultați site-ul pentru termeni și condiții detaliate. Păstrați dovada achiziției pentru solicitări de garanție.
Asistență pentru clienți
For technical assistance, troubleshooting, or product inquiries, please contact Topvision customer support. Refer to the contact information provided in your product packaging or on the official Topvision website-ul.
Online resources such as FAQs and video tutorials may also be available on the Topvision support page.