
1. Introducere
This manual provides detailed instructions for the safe and effective operation of your BSIDE ACM92 DC Current Clamp Meter. Please read this manual thoroughly before use and retain it for future reference.
The BSIDE ACM92 is a versatile digital multimeter designed for measuring DC and AC current, AC/DC voltage, frequency, resistance, and continuity. It also features V-alert non-contact voltage detection and live-wire checking capabilities.
2. Informații de siguranță
Măsuri importante de siguranță:
- Respectați întotdeauna codurile de siguranță locale și naționale.
- Do not use the meter if it appears damaged or operates abnormally.
- Asigurați-vă că sondele de testare sunt conectate corect și în stare bună înainte de utilizare.
- Evitați contactul cu circuitele electrice aflate sub tensiune.
- The device conforms to IEC-61010-1, IEC-61010-2-030, IEC-61010-2-032, IEC-61010-2-033 standards.
- Peste voltage protection class: CAT III 300V, CAT II 600V, pollution degree II.
DC Current Measurement Specifics:
- The readings for DC current can be influenced by the Earth's magnetic field due to the Hall effect sensor.
- Reducerea la zero: Always zero out the readings multiple times before each DC current measurement.
- Orientare: Once zeroed, hold the meter in the exact same orientation when taking readings. Do not tilt, twist, or rotate it, as changes in orientation can lead to false readings due to varying magnetic field strengths.
- Durata de măsurare: For accurate results, measure DC current within 3 seconds after zeroing.
3. Conținutul pachetului
Verificați dacă toate articolele sunt prezente în colet:
- 1 x BSIDE ACM92 Clamp Metru
- 1 x cabluri de testare (roșu și negru)
- 1 x Husă de transport
- 1 x șurubelniță
- 1 x Manual de utilizare (Acest document)
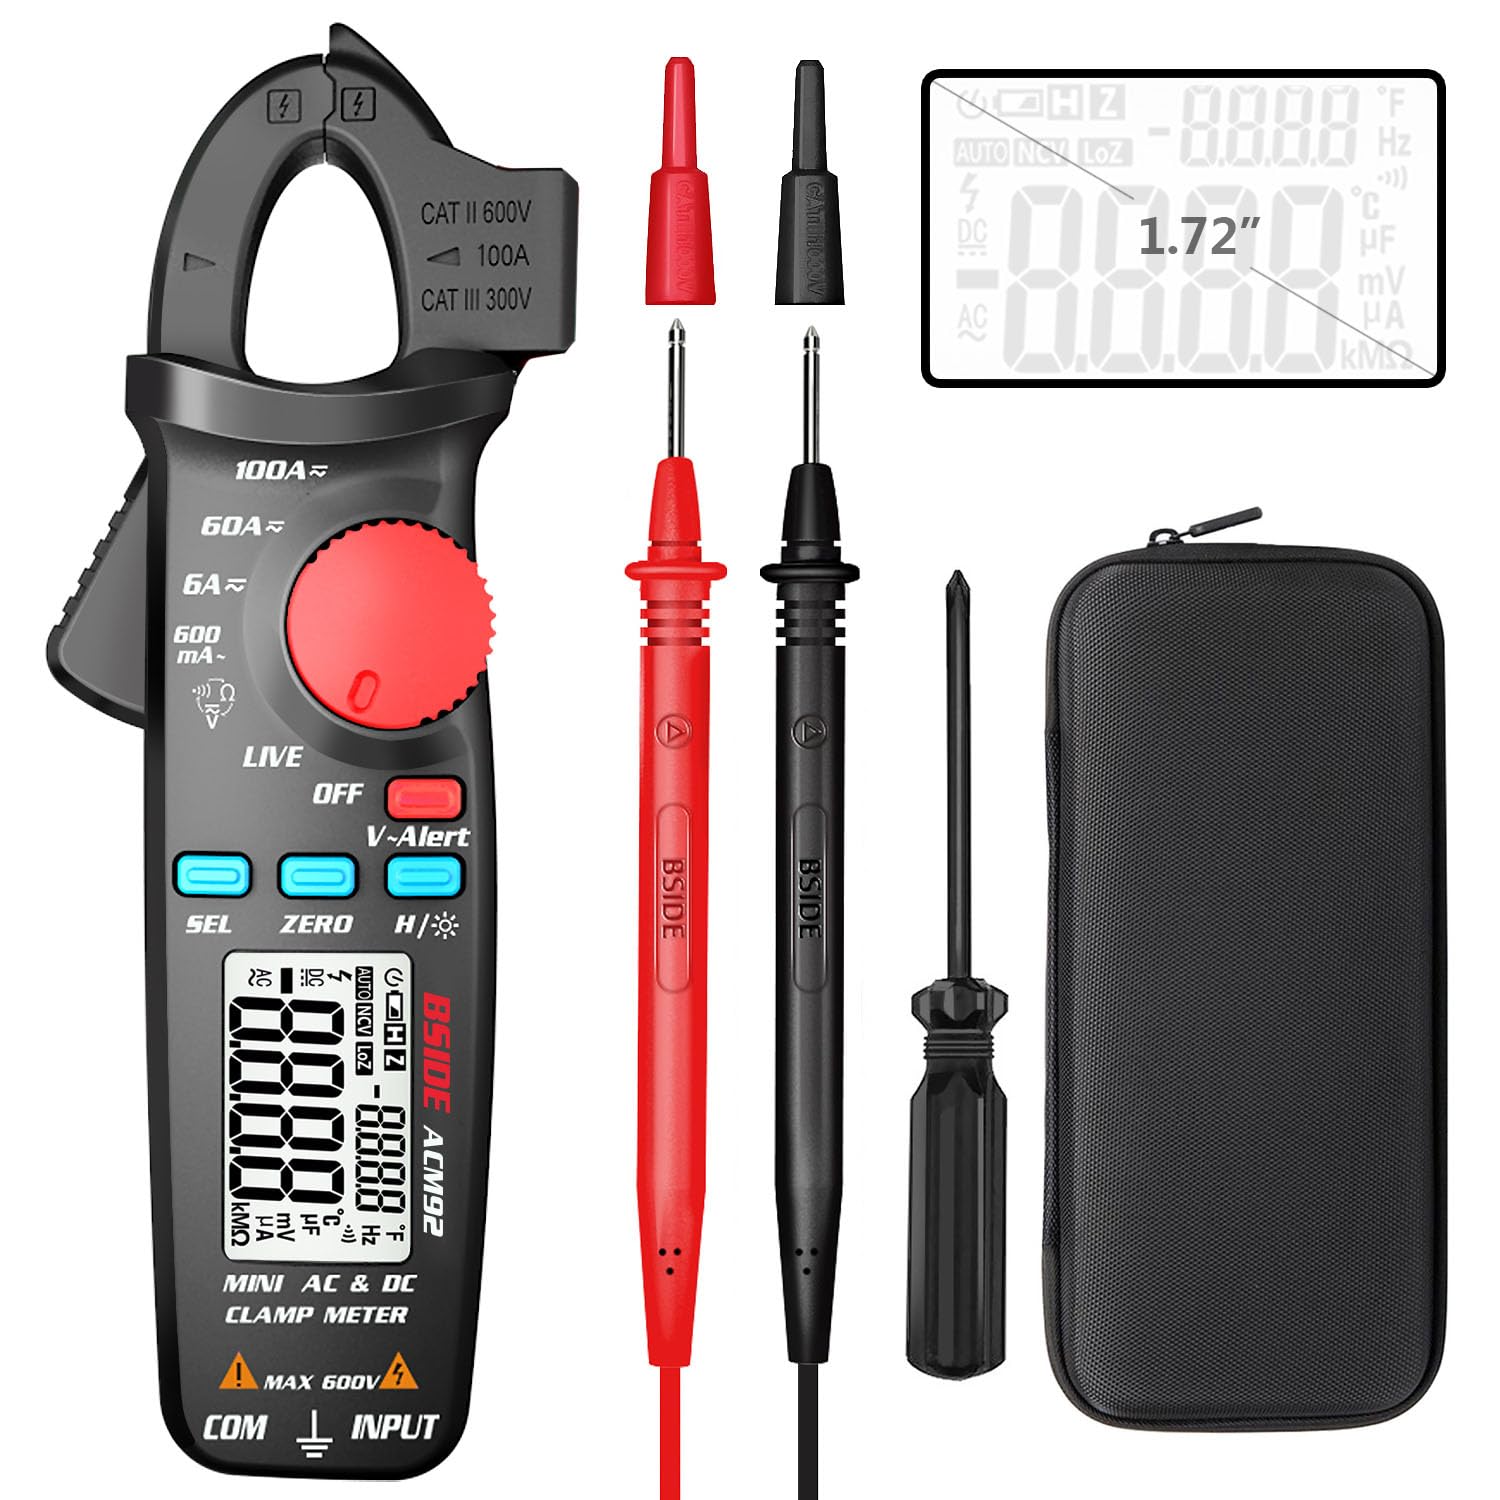
Image: The BSIDE ACM92 Clamp Meter, including the main unit, red and black test leads, a carrying case, and a small screwdriver.
4. Caracteristicile produsului
- Measures DC Current (minimum 1mA by jaws)
- Measures AC Current (minimum 0.1mA by jaws)
- Măsuri AC/DC Voltage
- V-Alert (Non-Contact Voltage Detectie)
- Live-Wire Check
- Measures Frequency, Resistance, and Continuity
- Clamp-on Frequency Function
- Oprire automată
- Funcția de păstrare a datelor
- Low Battery Indication with Backlight
- Dual Line Display: Shows both AC voltage/current and frequency simultaneously.

Image: The BSIDE ACM92 Clamp Meter displaying both current and frequency on its dual-line screen while clamping a wire.
Suport pentru sondă
The integrated probe holder on the side of the meter allows for convenient storage of test leads and can assist in hands-free measurements, especially in narrow or tight environments.

Image: The BSIDE ACM92 Clamp Meter with a test probe secured in its side holder, demonstrating convenient portability and readiness for use.
5. Configurare
5.1 Instalarea bateriei
- Asigurați-vă că aparatul de măsură este oprit.
- Localizați compartimentul bateriilor pe spatele contorului.
- Folosiți șurubelnița furnizată pentru a deschide capacul compartimentului bateriei.
- Introduceți două baterii AAA de 1.5 V, respectând polaritatea corectă (+/-).
- Puneți la loc capacul compartimentului bateriei și fixați-l cu șurubul.
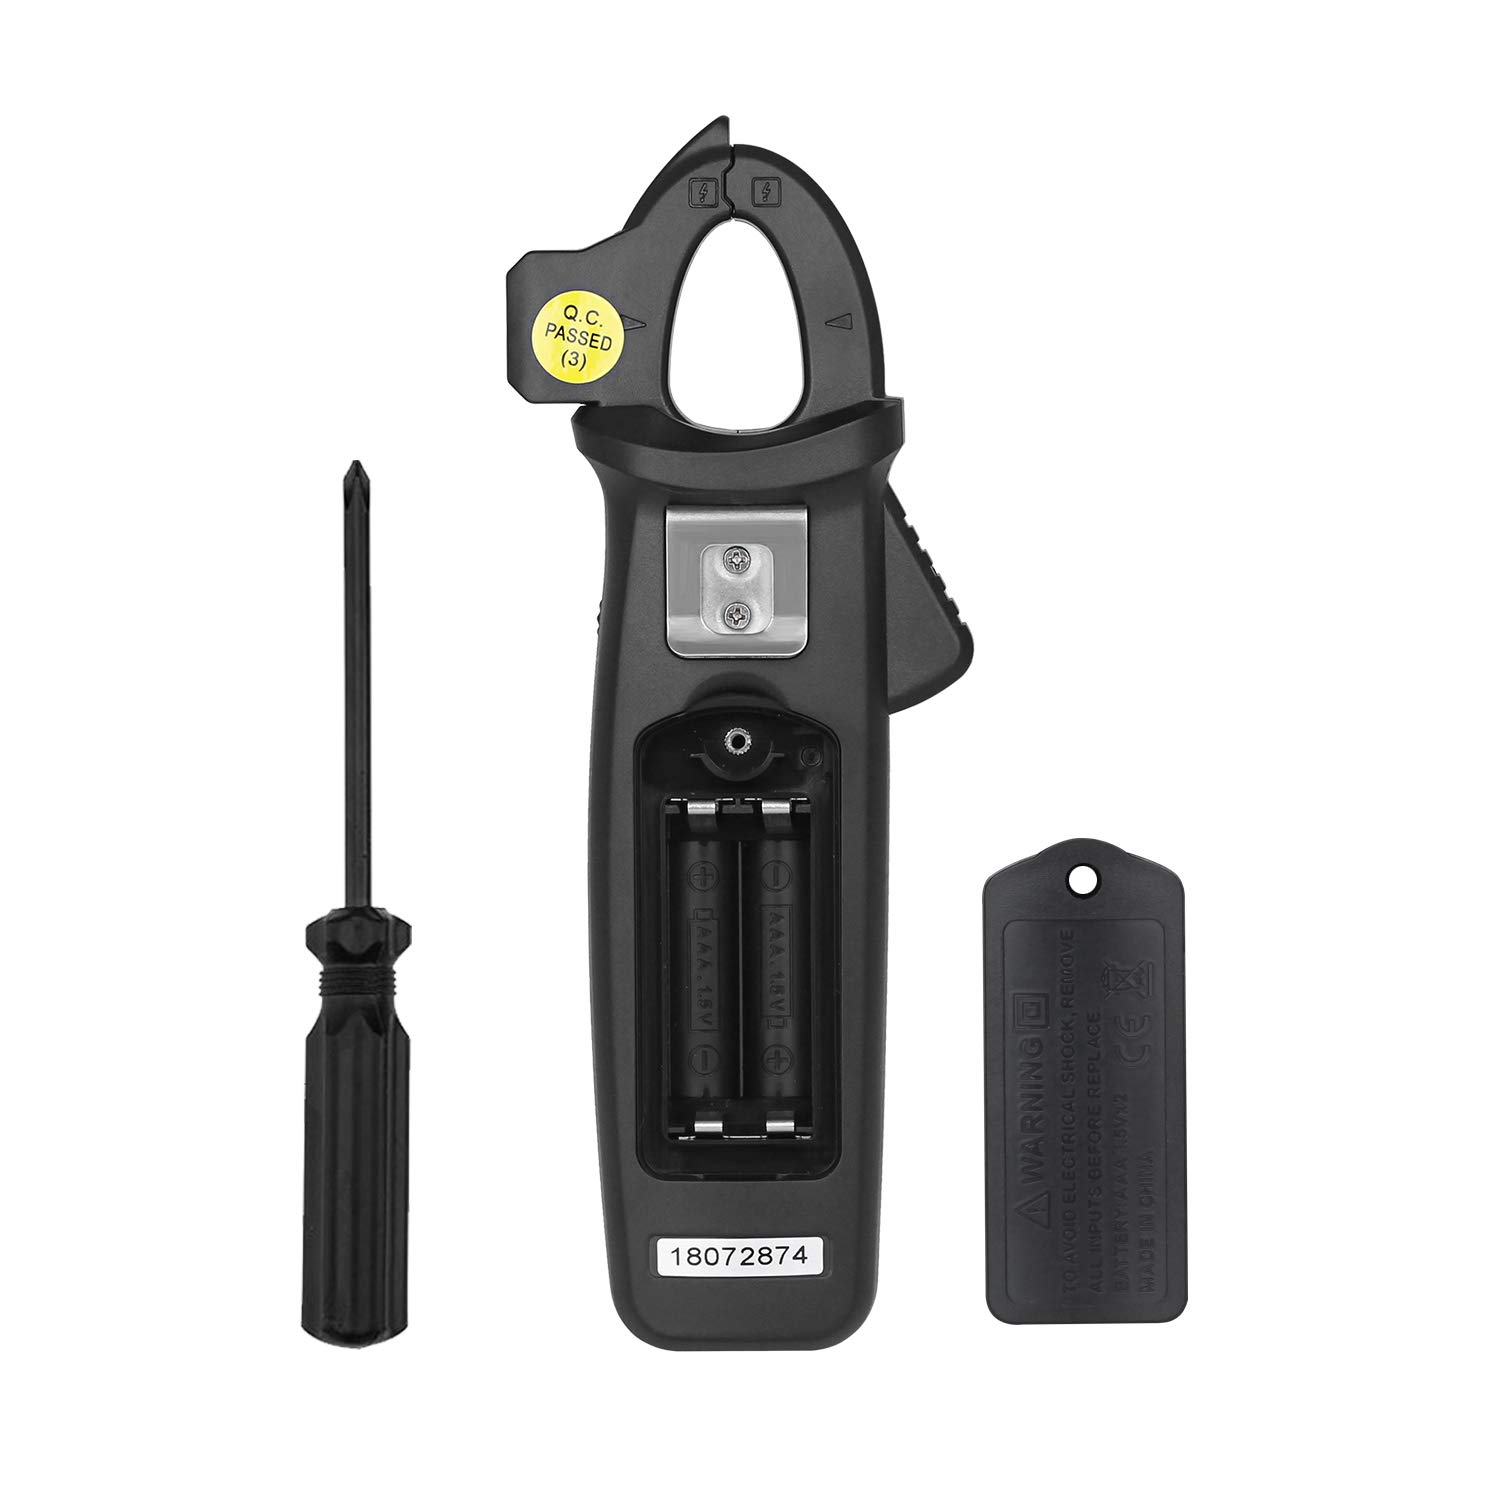
Image: The back of the BSIDE ACM92 Clamp Meter with the battery compartment open, showing the slots for two AAA batteries.
5.2 Conectarea cablurilor de testare
Pentru voltage, resistance, frequency (via leads), and continuity measurements, insert the red test lead into the "INPUT" jack and the black test lead into the "COM" jack.
6. Instrucțiuni de utilizare
Rotiți butonul central pentru a selecta funcția de măsurare dorită.
6.1 DC Current Measurement (by Jaws)
- Turn the dial to the DC current range (e.g., 6A, 60A, 100A).
- Press and hold the "ZERO" button for 2 seconds to zero the display. Repeat this several times.
- Deschide clamp jaws and enclose only one conductor of the circuit.
- Hold the meter in the same orientation as when zeroed.
- Read the DC current value on the display within 3 seconds for optimal accuracy.
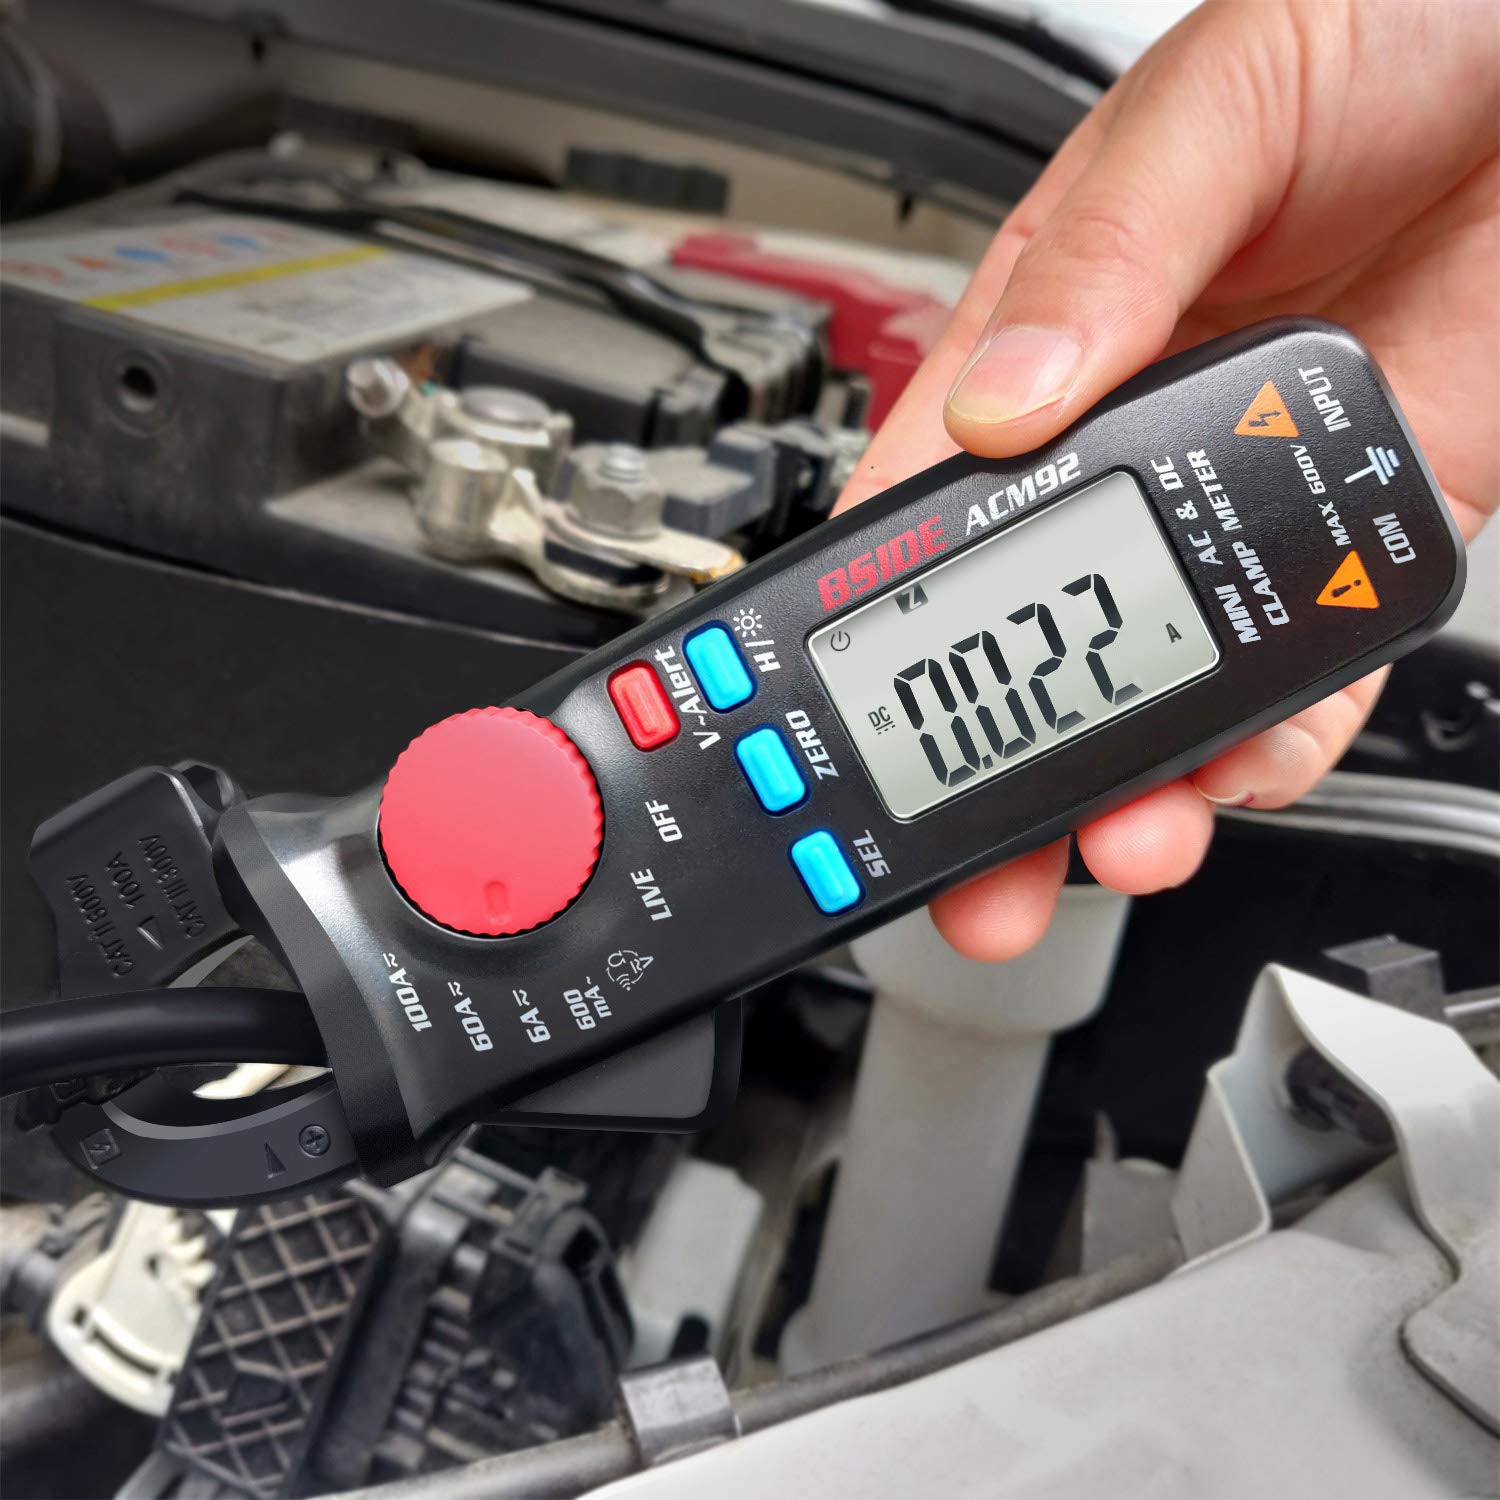
Image: The BSIDE ACM92 Clamp Meter measuring DC current on a car battery cable, showing a reading of 0.022A.
6.2 AC Current Measurement (by Jaws)
- Turn the dial to the AC current range (e.g., 600mA, 6A, 60A, 100A).
- Deschide clamp jaws and enclose only one conductor of the AC circuit.
- Citiți valoarea curentului alternativ de pe afișaj.

Image: The BSIDE ACM92 Clamp Meter measuring AC current by clamping a single wire within an electrical panel.
6.3 AC/DC Voltage Măsurare
- Connect the test leads to the "INPUT" and "COM" jacks.
- Turn the dial to the ACV or DCV range.
- Touch the test probes to the circuit points to be measured.
- Citiți voltage valoarea pe display.
6.4 V-Alert (Volum fără contact)tage Detectie)
- Turn the dial to the "V-Alert" position.
- Bring the tip of the clamp contor lângă un volțimetru de curent alternativtage sursa.
- The LCD display will flash, and an alarm buzzer will sound if AC voltage este detectat.

Image: The BSIDE ACM92 Clamp Meter in V-Alert mode, indicating the detection of non-contact voltage with a flashing display and audible alert.
6.5 Live-Wire Check
- Connect the red test lead to the "INPUT" jack.
- Turn the dial to the "LIVE" position.
- Touch the red probe to the conductor to be tested.
- The meter will indicate if the wire is live.

Image: The BSIDE ACM92 Clamp Meter performing a live wire check using the red test probe on an electrical circuit.
6.6 Măsurarea rezistenței și continuității
- Connect the test leads to the "INPUT" and "COM" jacks.
- Turn the dial to the Resistance/Continuity position.
- For resistance, touch the probes across the component.
- For continuity, touch the probes across the circuit. If resistance is less than 30Ω, the continuity beeper will sound.
6.7 Măsurarea frecvenței
Frequency can be measured either by the clamp jaws (for current frequency) or by test leads (for voltage frequency).
- Select the appropriate frequency range using the dial.
- Folosiți clamp jaws for current frequency or test leads for voltage frecventa.
- Citiți valoarea frecvenței pe afișaj.
6.8 Funcția de păstrare a datelor
Press the "H/*" button briefly to hold the current reading on the display. Press it again to release the hold.
6.9 Lumina de fundal
Press and hold the "H/*" button for 2 seconds to turn the backlight on or off.
7. Întreținere
7.1 Curățare
Ștergeți contorul cu reclamăamp o lavetă și un detergent blând. Nu utilizați abrazive sau solvenți. Asigurați-vă că aparatul de măsură este uscat înainte de depozitare sau utilizare.
7.2 Înlocuirea bateriei
When the low battery indicator appears on the display, replace the batteries as described in the "Battery Installation" section (5.1).
7.3 Depozitare
If the meter is not used for an extended period, remove the batteries to prevent leakage and store it in the provided carrying case in a cool, dry place.
8. Depanare
| Problemă | Cauza posibila | Soluţie |
|---|---|---|
| Contorul nu pornește. | Baterii descărcate sau instalate incorect. | Verificați polaritatea bateriilor sau înlocuiți bateriile. |
| Inaccurate DC current readings. | Not zeroed correctly; meter orientation changed; external magnetic fields. | Ensure proper zeroing before measurement. Maintain consistent meter orientation. Measure within 3 seconds. |
| AC current reading is zero when clamping a power cord. | Clamping both live and neutral wires simultaneously. | Ensure only a single conductor (live or neutral) is enclosed by the clamp fălci. |
| No reading with test leads. | Test leads not properly connected or damaged. | Verify test lead connection to "INPUT" and "COM" jacks. Check leads for damage. |
9. Specificații
| Măsurare | Gamă | Rezoluţie | Precizie |
|---|---|---|---|
| Afişa | 6000 conturi | ||
| Curent DC | 6A / 60A / 100A | 0.001A / 0.01A / 0.1A | ±(2.5%+10 counts) |
| Curent alternativ | 600mA / 6A / 60A / 100A | 0.1mA / 0.001A / 0.01A / 0.1A | ±(3.0%+10 counts) for 600mA; ±(2.5%+10 counts) for others |
| DC Voltage | 600V | 0.1V | ±(1.0%+5 counts) |
| AC Voltage | 600V | 0.1V | ±(1.0%+3 counts) |
| Rezistenţă | 6000Ω | 1Ω | ±(1.0%+3 counts) |
| Frequency (by leads) | 60Hz / 1000Hz | 0.1Hz / 1Hz | ±(1.5%+5 counts) |
| Frequency (by jaws) | 60Hz / 1000Hz | 0.1Hz / 1Hz | ±(1.0%+5 counts) |
| Continuitate | Beeper sounds at < 30Ω | ||
| Jaw Capacity | 20mm | ||
| Putere | 2 baterii AAA de 1.5 V | ||
| Dimensiuni | 179 x 67 x 36 mm (7.05 x 2.64 x 1.42 inchi) | ||
| Greutate | 137 g (4.83 uncii) | ||
10. Garanție și asistență
Informațiile privind garanția produsului și asistența pentru clienți nu au fost disponibile în datele de produs furnizate. Vă rugăm să consultați ambalajul produsului sau certificatul oficial al producătorului. website for details on warranty coverage and technical assistance.