
1. Introducere
Thank you for choosing the Vacmaster 10 Gallon 4 Peak HP Wet/Dry Vacuum with Detachable Blower, model VBVA1010PF. This manual provides essential information for the safe assembly, operation, maintenance, and troubleshooting of your new appliance. Please read all instructions carefully before use and retain this manual for future reference.
2. Instrucțiuni importante de siguranță
AVERTISMENT: Pentru a reduce riscul de incendiu, electrocutare sau vătămare corporală, citiți și înțelegeți toate instrucțiunile înainte de a utiliza acest aparat.
- Nu lăsați aparatul nesupravegheat când este conectat la priză. Deconectați-l de la priză atunci când nu îl utilizați și înainte de întreținere.
- Nu utilizați în aer liber sau pe suprafețe umede.
- Nu permiteți să fie folosit ca jucărie. Este necesară o atenție deosebită atunci când este utilizat de copii sau în apropierea acestora.
- Utilizați numai așa cum este descris în acest manual. Utilizați numai atașamentele recomandate de producător.
- Nu utilizați cu cablul sau ștecherul deteriorat. Dacă aparatul nu funcționează așa cum ar trebui, a fost scăpat, deteriorat, lăsat în aer liber sau scăpat în apă, returnați-l la un centru de service.
- Nu trageți sau transportați cu cablul, nu folosiți cablul ca mâner, nu închideți o ușă pe cablu și nu trageți cablul în jurul marginilor sau colțurilor ascuțite. Nu treceți aparatul peste cablu. Țineți cablul departe de suprafețele încălzite.
- Nu deconectați trăgând de cablu. Pentru a deconecta priza, apucați de ștecher, nu de cablu.
- Nu manipulați ștecherul sau aparatul cu mâinile ude.
- Nu introduceți niciun obiect în deschideri. Nu utilizați cu orice deschidere blocată; feriți-vă de praf, scame, păr și orice ar putea reduce fluxul de aer.
- Țineți părul, hainele largi, degetele și toate părțile corpului departe de deschideri și părți în mișcare.
- Nu ridicați nimic care arde sau care fumează, cum ar fi țigări, chibrituri sau cenușă fierbinte.
- Nu utilizați pentru a ridica lichide inflamabile sau combustibile, cum ar fi benzina, și nu utilizați în zone în care acestea pot fi prezente.
- Nu utilizați fără filtrele la locul lor.
- Opriți toate comenzile înainte de a deconecta.
- Aveți grijă suplimentară când curățați pe scări.
- Nu utilizați pentru aspirarea de materiale toxice, cancerigene, combustibile sau alte materiale periculoase, cum ar fi azbestul, arsenicul, bariul, beriliul, plumbul, pesticidele sau alte materiale care pot pune în pericol sănătatea.
- Do not use to pick up soot, cement, plaster or drywall dust without a cartridge filter and filter bag in place. These are very fine particles that may affect the performance of the motor or be exhausted back into the air.
- Pentru a reduce riscul de electrocutare, acest aparat are un ștecher polarizat (o lamă este mai lată decât cealaltă). Acest ștecher se va potrivi într-o priză polarizată doar într-un singur sens. Dacă ștecherul nu se potrivește complet în priză, inversați ștecherul. Dacă tot nu se potrivește, contactați un electrician calificat pentru a instala priza corespunzătoare. Nu schimbați ștecherul în niciun fel.
3. Conținutul pachetului
Verificați dacă toate componentele enumerate mai jos sunt incluse în pachet. Dacă lipsesc sau sunt deteriorate piese, vă rugăm să contactați serviciul de asistență pentru clienți.
- Vacmaster Wet/Dry Vacuum Unit (10 Gallon Tank, Motor Head)
- Detachable Blower Unit
- Flexible Hose (7 ft)
- Tije de extensie (2 bucăți)
- Duza de podea
- Instrument pentru crăpături
- Duză utilitară
- Cartridge Filter (for dry pickup)
- Foam Filter (for wet pickup)
- Manual de utilizare (acest document)
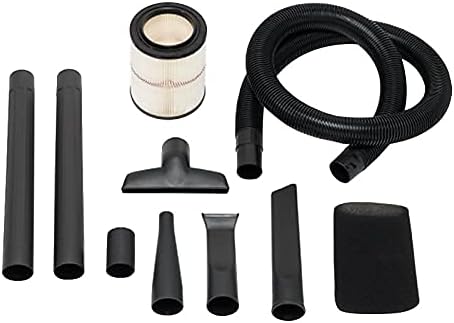
Image: Various accessories for the Vacmaster Wet/Dry Vacuum, including the flexible hose, two extension wands, a floor nozzle, a crevice tool, a utility nozzle, and both cartridge and foam filters.
4. Instrucțiuni de configurare
4.1 Despachetarea
- Scoateți tot conținutul din ambalaj.
- Asigurați-vă că toate piesele sunt prezente și nedeteriorate.
4.2 Atașarea roților
- Invert the tank.
- Introduceți cele patru picioare rotițe în fantele de pe fundul rezervorului.
- Press firmly until each caster foot clicks securely into place.
4.3 Instalarea filtrului
The correct filter must be installed for the type of cleaning you are performing.
For Dry Vacuuming: Cartridge Filter
- Asigurați-vă că filtrul de spumă este îndepărtat.
- Slide the cartridge filter over the filter cage on the motor head.
- Secure the filter with the filter cap by twisting it clockwise until tight.
For Wet Vacuuming: Foam Filter
- Remove the cartridge filter and filter cap.
- Slide the foam filter over the filter cage on the motor head.
- Asigurați-vă că filtrul de spumă acoperă complet carcasa filtrului.
4.4 Atașarea furtunului și a accesoriilor
- Insert the large end of the flexible hose into the vacuum port on the tank and twist to lock.
- Attach desired accessories (extension wands, floor nozzle, crevice tool, utility nozzle) to the other end of the hose.

Image: The Vacmaster Wet/Dry Vacuum fully assembled, showing the main unit, flexible hose, and floor nozzle ready for use.
5. Instrucțiuni de utilizare
5.1 Funcționare generală
- Ensure the vacuum is properly assembled with the correct filter for your task.
- Plug the power cord into a suitable 120V grounded outlet.
- Turn the power switch located on the motor head to the 'ON' position to start the vacuum.
- To stop operation, turn the power switch to the 'OFF' position.
5.2 Aspirarea uscată
Use the cartridge filter for dry debris pickup.
- Asigurați-vă că filtrul cu cartuș este instalat corect.
- Use appropriate accessories for the type of dry debris (e.g., floor nozzle for large areas, crevice tool for tight spaces).
- Regularly check and clean the cartridge filter to maintain optimal suction.
5.3 Aspirarea umedă
Use the foam filter for liquid pickup.
- Ensure the foam filter is securely installed and the cartridge filter is removed.
- Do not overfill the tank. The vacuum is equipped with an automatic shut-off float mechanism that will stop suction when the tank is full. If suction stops, turn off the vacuum, unplug it, and empty the tank.
- After wet pickup, always empty and clean the tank thoroughly to prevent mold and odors.
5.4 Detachable Blower Function
Your Vacmaster unit features a detachable blower for versatile use.
- Detaching the Blower: Locate the release latches on the motor head. Unlatch them and lift the motor head from the tank. The motor head itself functions as the blower unit.
- Attaching Blower Nozzle: Attach the desired blower nozzle to the air outlet port on the motor head.
- Operare: Plug the blower unit into a 120V grounded outlet. Turn the power switch to 'ON' to operate the blower.
- Reattaching to Vacuum: To convert back to a vacuum, place the blower unit (motor head) back onto the tank, aligning the latches, and secure them.

Image: A person demonstrating the detachment of the blue blower unit from the main vacuum tank, highlighting the versatility of the product.
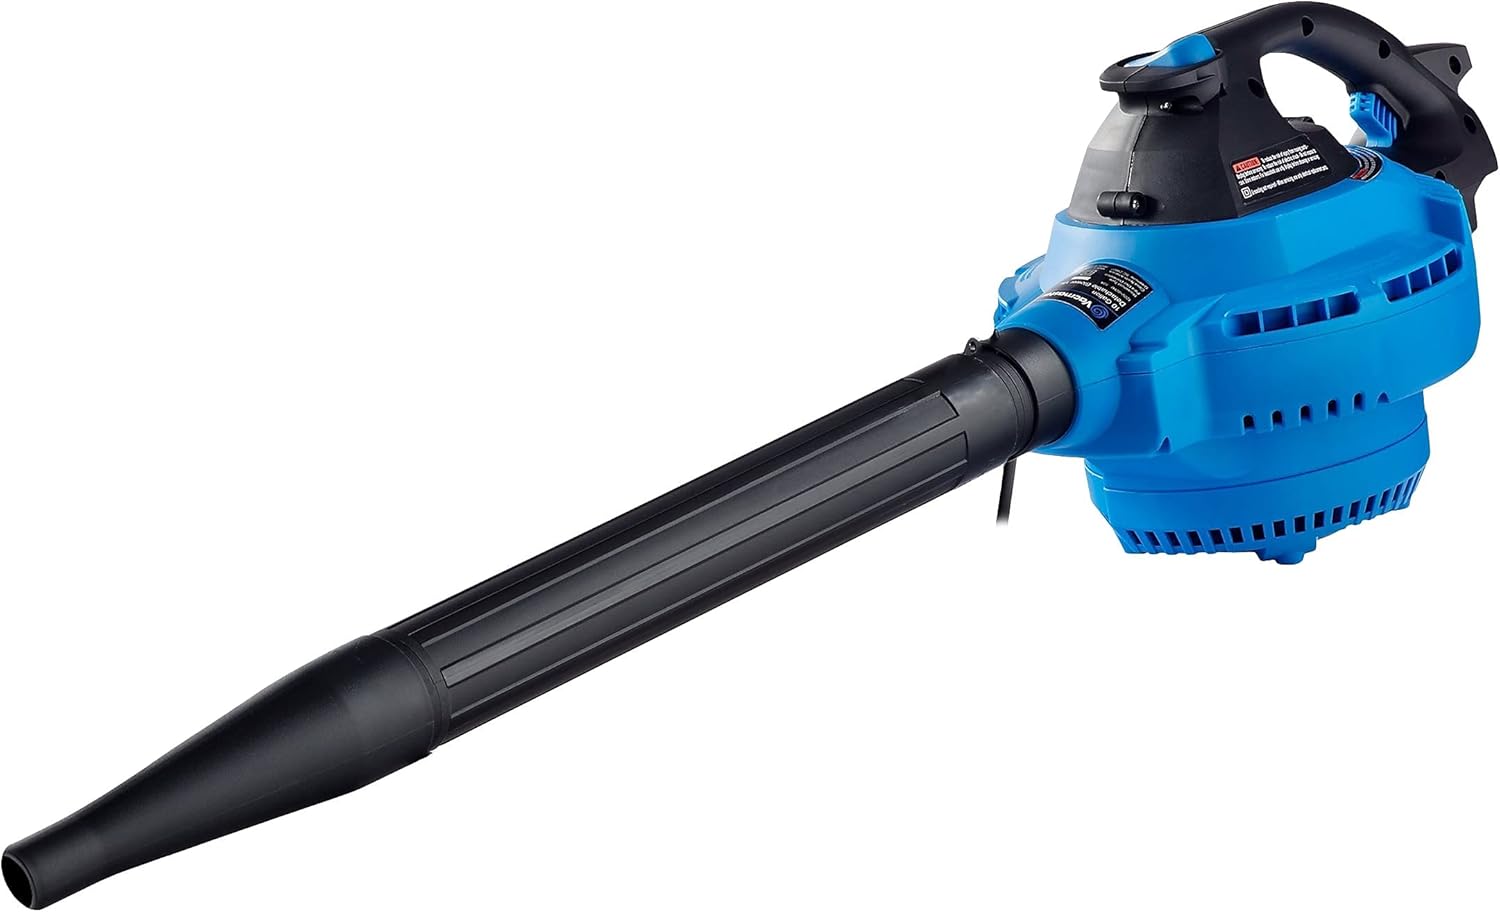
Image: The detached blower unit, a compact blue device with a black handle and a long black nozzle, ready for use as a standalone blower.
6. Întreținere
Regular maintenance ensures optimal performance and extends the life of your Vacmaster wet/dry vacuum.
6.1 Curățarea și înlocuirea filtrului
Always unplug the vacuum before performing any maintenance.
Cartridge Filter (Dry Pickup)
- Remove the filter cap and cartridge filter from the filter cage.
- Gently tap the filter against the inside of a trash can to remove loose dirt.
- For thorough cleaning, rinse the filter under running water. Allow it to air dry completely before reinstallation. Do not use the filter if it is still wet.
- Replace the cartridge filter if it is damaged or if suction performance significantly decreases after cleaning.
Foam Filter (Wet Pickup)
- Scoateți filtrul de spumă din carcasa filtrului.
- Clătiți filtrul de spumă sub jet de apă pentru a îndepărta resturile.
- Squeeze out excess water and allow it to air dry completely before storage or reinstallation.
6.2 Tank Cleaning
- After each use, especially wet pickup, empty the tank of all debris and liquids.
- Rinse the inside of the tank with water and mild detergent if necessary.
- Wipe the tank dry or allow it to air dry completely before storing to prevent odors and mildew.
6.3 Îngrijirea furtunului și a accesoriilor
- Inspect the hose and accessories for blockages or damage before and after each use.
- Clean accessories with water and mild detergent as needed.
- Store the hose and accessories neatly to prevent kinking or damage. The vacuum unit has integrated storage for the hose and some accessories.

Image: The Vacmaster Wet/Dry Vacuum with its hose wrapped around the top and accessories stored in designated slots, demonstrating compact storage.
7. Depanare
If you encounter issues with your Vacmaster wet/dry vacuum, refer to the following common problems and solutions:
| Problemă | Cauza posibila | Soluţie |
|---|---|---|
| Aspiratorul nu pornește. | Nu există curent la priză. Cablul de alimentare nu este conectat. Întrerupător de alimentare defect. | Verificați întrerupătorul/siguranța. Ensure cord is firmly plugged into a working outlet. Contactați asistența pentru clienți. |
| Pierderea aspirației. | Hose or accessory clogged. Filtrul este murdar sau înfundat. Tank is full (wet pickup). Capacul nu este etanșat corespunzător. | Clear any blockages from hose or accessories. Curățați sau înlocuiți filtrul. Goliți rezervorul. Ensure motor head latches are securely fastened. |
| Motorul merge, dar nu aspira. | Hose not connected to inlet. Hose or accessory clogged. Tank is full (wet pickup). | Ensure hose is securely attached to the vacuum port. Îndepărtați orice blocaje. Goliți rezervorul. |
| Praful iese din eșapament. | Filter is missing or damaged. Filtrul nu este instalat corect. | Install or replace the correct filter. Ensure filter is properly seated and secured. |
8. Specificații
| Caracteristică | Detaliu |
|---|---|
| Marca | Vacmaster |
| Model | VBVA1010PF |
| Capacitate | 10 de galoane |
| Motor | 4 Peak HP, 120V |
| Wattage | 270 wați |
| Ampepoca | 10 Amps |
| Lungimea furtunului | 7 picioare |
| Lungimea cablului | 10 picioare |
| Dimensiuni produs (L x l x H) | 18 x 18 x 24 inci |
| Greutatea articolului | 26.2 lire sterline |
| Tip filtru | Cartridge (Dry), Foam (Wet) |
| Caracteristici speciale | Wet/Dry Functionality, Detachable Blower |
| Număr de identificare comercială globală (GTIN) | 00814953015406 |
| Cod universal de produs (UPC) | 814953015406 |
9. Informații despre garanție
This Vacmaster product is covered by a Garanție de 1 an de la producător from the date of purchase. This warranty covers defects in materials and workmanship under normal use. It does not cover damage resulting from misuse, abuse, accident, commercial use, or unauthorized repairs. Please retain your proof of purchase for warranty claims.
10. Asistență pentru clienți
For technical assistance, replacement parts, or warranty inquiries, please contact Vacmaster customer support. Refer to the official Vacmaster website-ul sau ambalajul produsului pentru cele mai recente informații de contact.
When contacting support, please have your model number (VBVA1010PF) and proof of purchase readily available.