
Introducere
Thank you for choosing the MASO 1080P HD Car DVR Dash Cam. This device is designed to record your driving journey in high definition, providing crucial evidence in case of incidents and enhancing your overall road safety. Please read this manual carefully before operating the device to ensure proper use and optimal performance.
This dash cam features 1080P Full HD recording, a 2.5-inch TFT LCD screen, G-Sensor functionality for automatic incident detection, loop recording, and night vision capabilities. It supports up to a 32GB TF card (not included).
Ce este în cutie
La deschiderea pachetului, vă rugăm să verificați dacă sunt incluse toate următoarele articole:
- 1 x MASO Car DVR (High Definition Version)
- 1 x cablu USB
- 1 x suport de aspirație
- 1 x Manual de utilizare
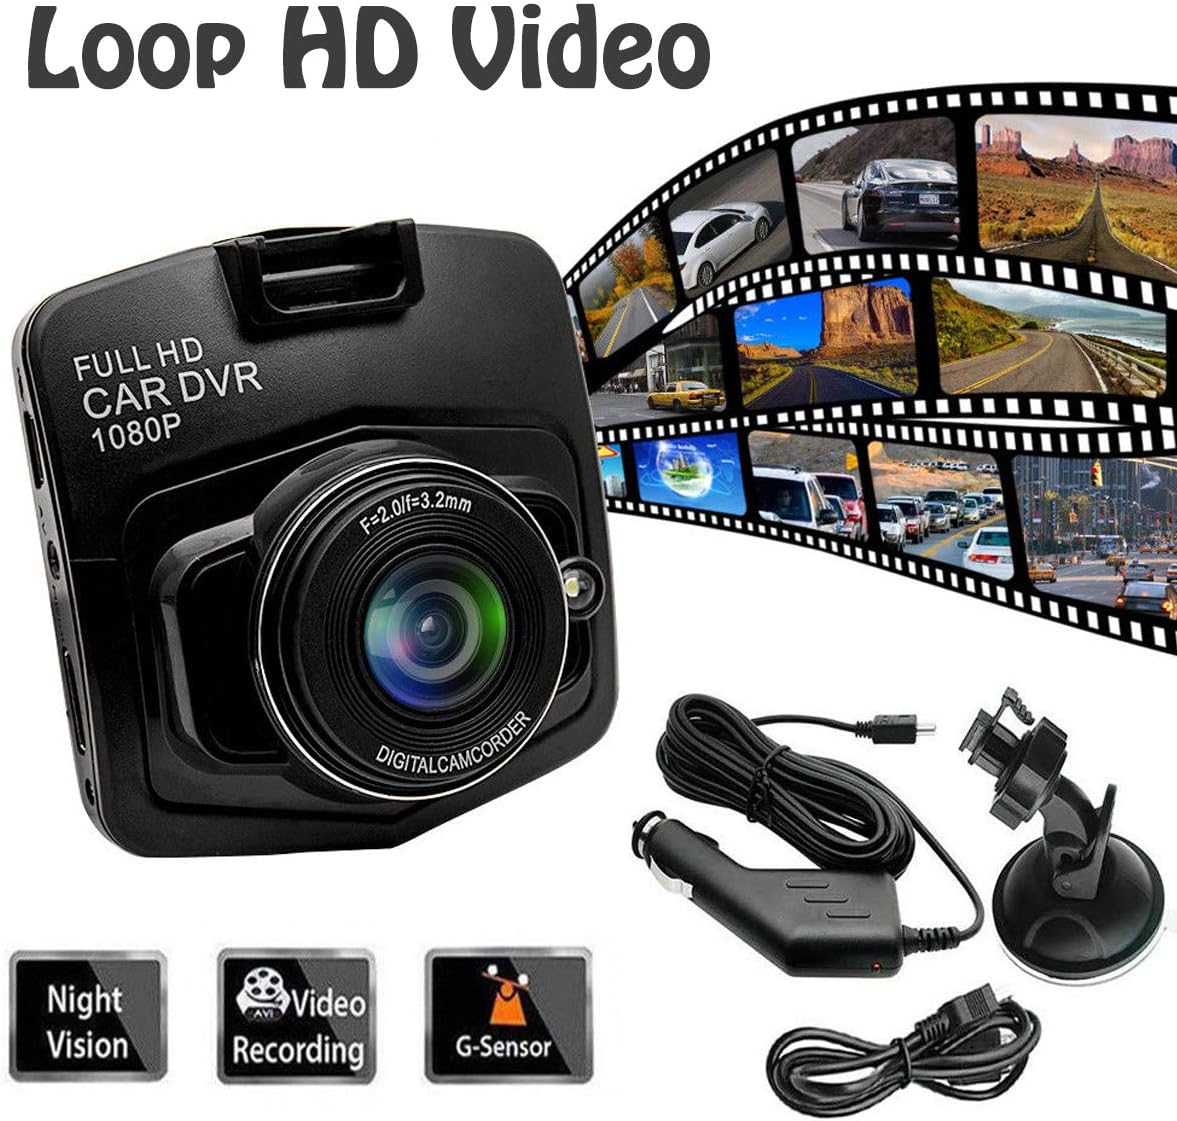
Figura 1: Conținutul pachetului. This image displays the MASO Car DVR, USB cable, suction mount, and user manual, which are included in the product package.
Specificații
| Numele produsului | 1080P Full High Definition Dash Cam |
| Material | Plastic |
| Culoare | Negru |
| Actual | 0.5 A |
| Voltage | DC 5 V |
| Putere | 2.5 W |
| Dimensiunea produsului | 9 x 7 x 4 cm (aproximativ 3.54 x 2.76 x 1.57 inci) |
| Afişa | 2.5-inch TFT LCD Screen |
| Rezoluție captură video | 1080p |
| Câmpul de View | 170 de grade |
| Caracteristici speciale | G-Sensor, Night Vision, Loop Recording, Motion Detection |
| Conectivitate | USB |
| Depozitare | Suportă card TF de până la 32 GB (nu este inclus) |

Figura 2: Dimensiunile produsului. This image shows the MASO Dash Cam with its approximate dimensions of 60mm x 60mm.
Instrucțiuni de configurare
Follow these steps to properly install your MASO Dash Cam in your vehicle:
- Pregătiți cardul MicroSD: Insert a compatible MicroSD card (up to 32GB, Class 10 or higher recommended) into the dash cam's card slot. Ensure the card is formatted before first use (refer to the "Operating Instructions" section for formatting).
- Atașați suportul de ventuză: Securely attach the suction mount to the dash cam.
- Montați camera de bord: Adhere the dash cam with the suction mount to the front windshield, ideally behind the rearview oglindă, asigurându-vă că nu vă obstrucționează vederea view.
- Dirijați cablul de alimentare: Carefully route the USB power cable along the front upper edge of the windshield and down the A-pillar.
- Conectare la alimentare: Insert the cigarette lighter adapter into your vehicle's 12V power outlet and connect the USB cable to the adapter and the dash cam.
- Reglați unghiul camerei: Power on the vehicle and adjust the camera lens to capture the desired view a drumului din fata.
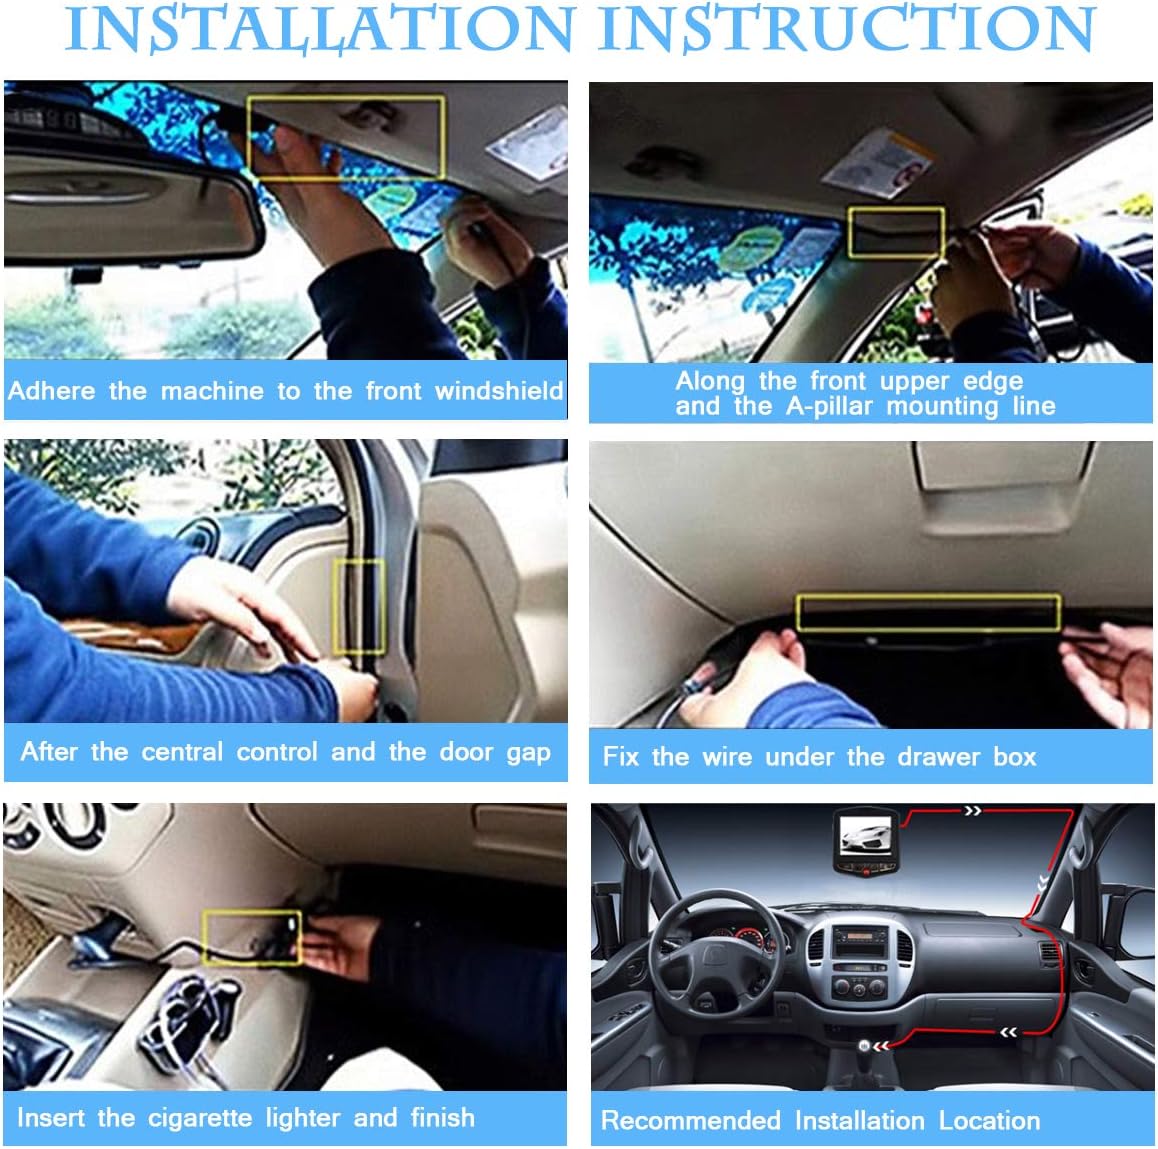
Figura 3: Pași de instalare. This image illustrates the recommended installation process, including mounting the device, routing the cable, and connecting to the power source.
Instrucțiuni de operare
Pornire/Oprire
- Camera de bord se va porni automat și va începe înregistrarea atunci când contactul vehiculului este cuplat (dacă este conectată la o sursă de alimentare comutată).
- Se va opri automat la scurt timp după ce contactul este oprit.
- Pentru a porni/opri manual alimentarea, apăsați și țineți apăsat butonul de alimentare.
Moduri de înregistrare
- Înregistrare în buclă: The dash cam continuously records video in segments (e.g., 1, 3, or 5 minutes). When the memory card is full, it automatically overwrites the oldest unlocked footage.
- Senzor G (Înregistrare de urgență): In the event of a sudden impact or collision, the built-in G-Sensor will detect the event and automatically lock the current video segment, preventing it from being overwritten by loop recording. This footage is saved in a separate "Event" folder.
- Detectarea mișcării: When enabled, the dash cam will automatically start recording if it detects motion in front of the vehicle while parked. This feature requires a continuous power supply (e.g., hardwiring kit, not included) to function when the vehicle is off.
- Vedere de noapte: The dash cam is equipped with night vision technology to enhance video clarity in low-light conditions.

Figure 4: G-Sensor Function. This image highlights the G-Sensor's ability to lock and save important video footage with a single button press during an event.

Figure 5: Day and Night Vision. This image demonstrates the dash cam's performance in both bright daylight and low-light night conditions.
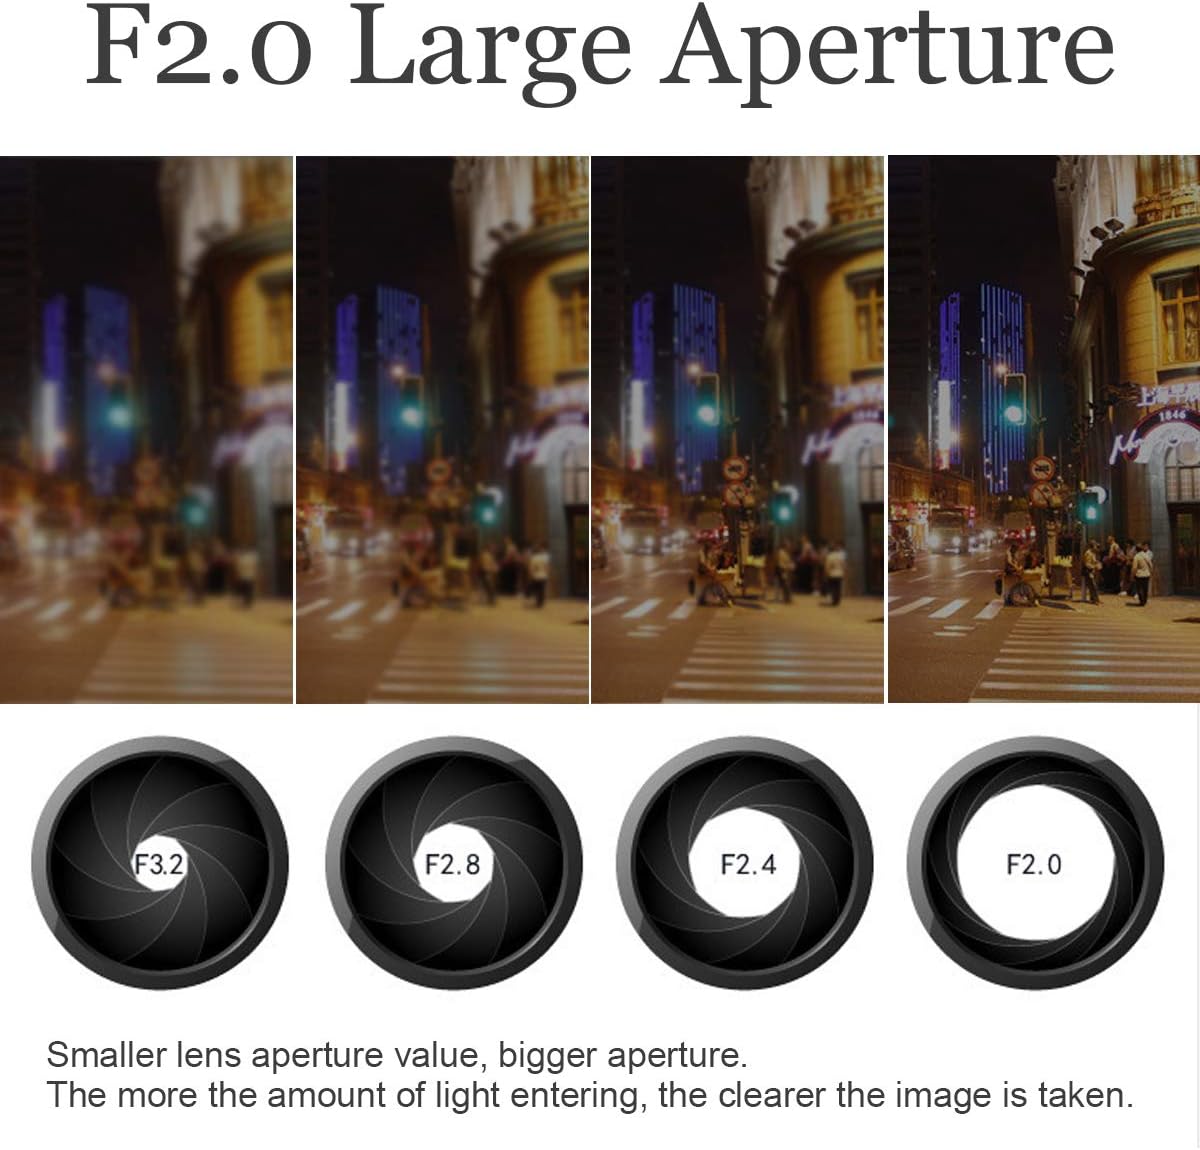
Figure 6: F2.0 Large Aperture. This image explains how a larger aperture (F2.0) allows more light to enter the lens, resulting in clearer images, especially in low light.
Navigare meniu
Use the buttons on the dash cam to navigate through the menu options. Common settings include:
- Rezoluţie: Set video recording quality (e.g., 1080P, 720P).
- Înregistrare în buclă: Adjust segment length (e.g., Off, 1 min, 3 min, 5 min).
- Sensibilitatea senzorului G: Adjust the sensitivity of the G-Sensor (Low, Medium, High, Off). Higher sensitivity means it will trigger more easily.
- Detectarea mișcării: Activați sau dezactivați această funcție.
- Data/Ora Stamp: Activați sau dezactivați afișarea datei și orei pe videoclipurile înregistrate.
- Formatează cardul SD: Erase all data on the MicroSD card. This is recommended periodically.
Întreţinere
- Curățați lentila: Regularly clean the camera lens with a soft, lint-free cloth to ensure clear video quality. Avoid abrasive materials.
- Formatați cardul MicroSD: It is recommended to format the MicroSD card every 2-4 weeks to maintain optimal recording performance and prevent data corruption. Back up any important files înainte de formatare.
- Check Mount: Periodically check that the suction mount is securely attached to the windshield.
- Temperatură: Evitați expunerea camerei de bord la temperaturi extreme pentru perioade lungi de timp, deoarece acest lucru poate afecta durata de viață a bateriei și performanța dispozitivului.
Depanare
| Problemă | Soluție posibilă |
|---|---|
| Camera de bord nu pornește. |
|
| Dash cam stops recording or shows "Card Full" error. |
|
| Video footage este neclară sau neclară. |
|
| Dash cam does not save date and time. |
|
| G-Sensor is too sensitive or not sensitive enough. |
|
Informații despre garanție
MASO products typically come with a standard manufacturer's warranty. Please refer to the warranty card included in your package or contact MASO customer support for specific warranty terms and conditions. Keep your purchase receipt as proof of purchase for warranty claims.
Asistență pentru clienți
If you encounter any issues or have questions not covered in this manual, please contact MASO customer support. You can usually find contact information on the product packaging, the official MASO website-ul web sau prin intermediul distribuitorului dumneavoastră.
For online resources, you may visit the MASO Store on Amazon pentru informații suplimentare despre produs.