
1. Introducere
This instruction manual provides essential information for the installation, operation, and maintenance of the Hikvision DS-7604NI-K1/4P 4-Channel 4K PoE Network Video Recorder (NVR). Please read this manual thoroughly before using the product to ensure correct and safe operation. Keep this manual for future reference.
2. Informații de siguranță
Respectați următoarele măsuri de siguranță pentru a preveni vătămările corporale sau deteriorarea dispozitivului:
- Alimentare electrică: Use only the power adapter specified for this device. Ensure the power voltage is stable and meets the device's requirements.
- Ventilare: Do not block ventilation openings. Ensure proper airflow to prevent overheating.
- Mediu: Avoid exposing the device to extreme temperatures, humidity, dust, or corrosive environments. Do not place heavy objects on the device.
- Instalare: Install the device on a stable surface. Avoid strong vibrations or impacts.
- Service: Nu încercați să dezasamblați sau să modificați dispozitivul. Apelați la personal calificat pentru orice intervenție de service.
3. Produs terminatview
The Hikvision DS-7604NI-K1/4P is a 4-channel Network Video Recorder designed for surveillance systems. It supports up to 4K resolution for live view, recording, and playback, and features Power-over-Ethernet (PoE) interfaces for direct connection and power supply to compatible IP cameras.
3.1 Conținutul pachetului
- Hikvision DS-7604NI-K1/4P NVR Unit
- Adaptor de alimentare
- Mouse USB
- Screws for HDD Installation
- Ghid de pornire rapidă
3.2 Panoul frontal
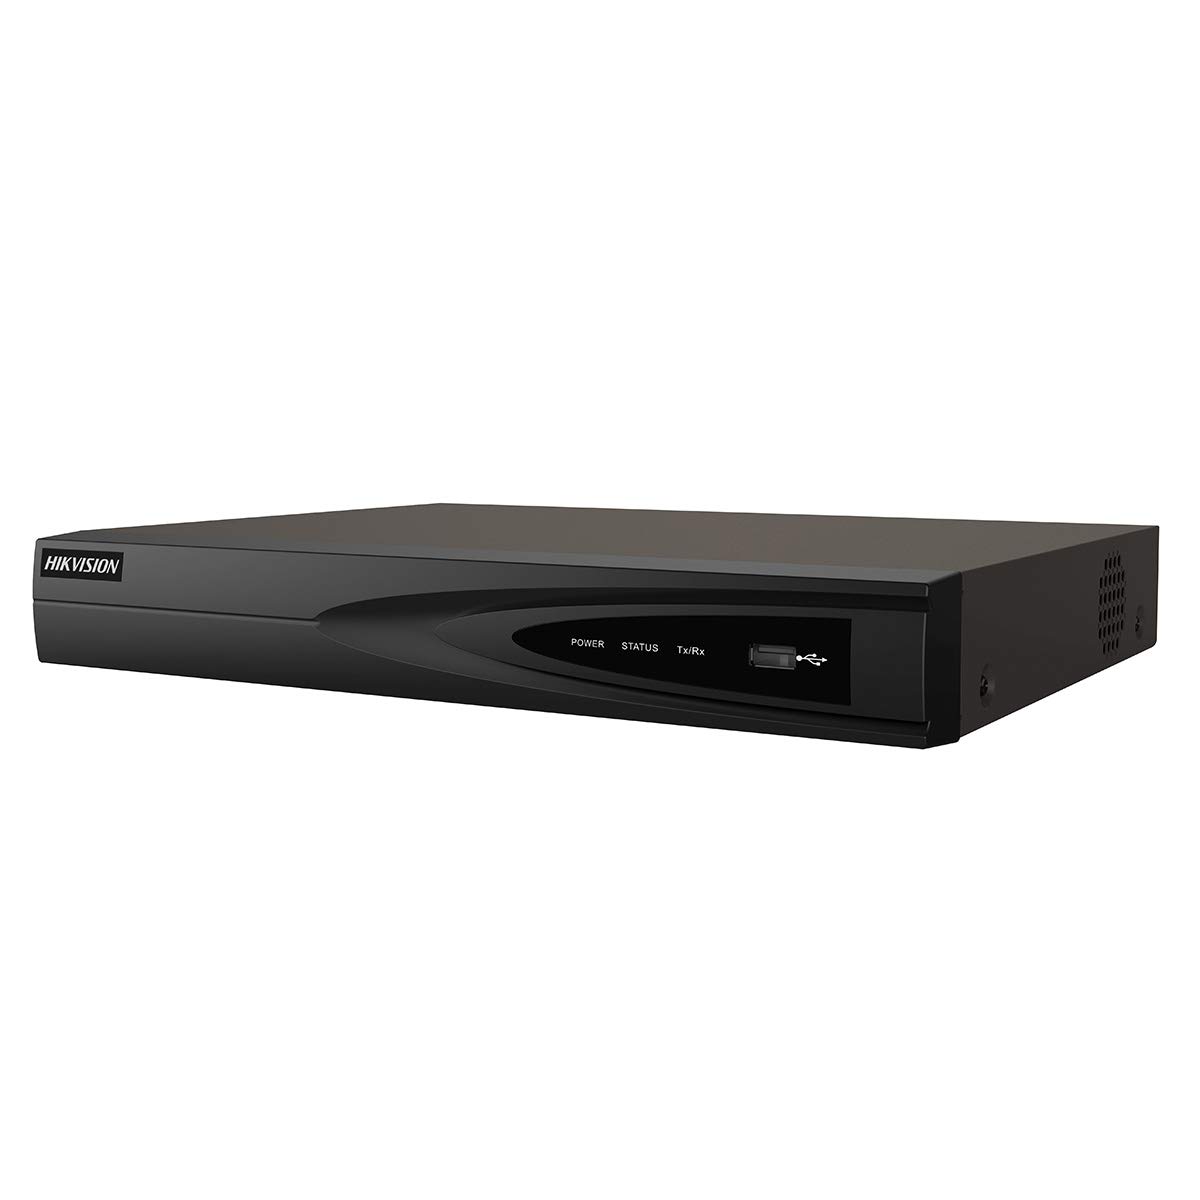
Imaginea 1: Față view of the Hikvision DS-7604NI-K1/4P NVR. This image displays the front panel of the NVR, typically featuring status indicator lights and a USB port for peripheral connections.
3.3 Panoul din spate
Panoul din spate include diverse porturi pentru conectivitate:
- PoE Ports (x4): For connecting IP cameras and providing power.
- Port LAN: For network connection to a router or switch.
- Ieșire HDMI: For connecting to a monitor or TV for high-definition video output.
- Ieșire VGA: For connecting to a monitor for video output.
- USB Ports (x2 total, typically one front, one rear): For mouse, USB drive, or other peripherals.
- Intrare audio (RCA): Pentru conectarea unei surse audio externe.
- Putere de intrare: Pentru conectarea adaptorului de alimentare.
4. Configurare
4.1 Instalarea hard disk-ului (opțional)
The NVR supports one internal SATA hard drive for video storage (up to 6 TB). If a hard drive is not pre-installed, follow these steps:
- Deșurubați și scoateți capacul superior al NVR-ului.
- Conectați cablul de date SATA și cablul de alimentare la hard disk.
- Align the hard drive with the mounting holes and secure it with the provided screws.
- Replace the NVR's top cover and secure it with screws.
4.2 Conectarea perifericelor
- Monitor: Conectați un monitor la portul de ieșire HDMI sau VGA al NVR-ului.
- Mouse: Conectați mouse-ul USB la un port USB al NVR-ului.
- Reţea: Connect the NVR's LAN port to your router or network switch using an Ethernet cable.
- Camere: Connect IP cameras to the NVR's PoE ports. The NVR will automatically power and detect compatible Hikvision PoE cameras.
4.3 Pornirea și configurarea inițială
- Conectați adaptorul de alimentare la intrarea de alimentare a NVR-ului și apoi la o priză.
- NVR-ul se va porni automat.
- Upon first boot, the NVR will guide you through an initialization wizard. Follow the on-screen prompts to set up a strong password, network settings, and hard drive formatting (if applicable).
- Ensure the hard drive is formatted before recording can begin.
5. Funcționare
5.1 În direct View
After initial setup, the NVR will display the live video feed from connected cameras on the monitor. You can switch between single-camera view și o grilă cu mai multe camere view folosind comenzile de pe ecran sau mouse-ul.
5.2 Înregistrare
NVR-ul acceptă diverse moduri de înregistrare:
- Înregistrare continuă: Înregistrează video în mod constant.
- Înregistrare detectare mișcare: Records only when motion is detected in the camera's view.
- Înregistrare programată: Înregistrări bazate pe un program predefinit.
Configure recording settings via the NVR's menu interface (typically accessible by right-clicking on the live view screen and selecting 'Menu').
5.3 Redare
Pentru a review inregistrat footage:
- Accesați meniul „Redare” din interfața principală a NVR-ului.
- Selectați camera (camerele) dorită(e) și intervalul de dată/oră.
- Folosește comenzile de redare (redare, pauză, derulare rapidă înainte, derulare înapoi) pentru a naviga prin fișiere.tage.
5.4 Acces de la distanță
Pentru telecomandă viewing and management, download the Hik-Connect app on your mobile device or use the Hik-Connect web portal. The NVR must be connected to the internet, and you will need to register the device with your Hik-Connect account. Refer to the Hik-Connect documentation for detailed instructions.
6. Întreținere
6.1 de actualizări de firmware
Periodically check the official Hikvision website for firmware updates. Updating the firmware can improve performance, add new features, and enhance security. Follow the instructions provided with the firmware update package carefully.
6.2 Gestionarea hard disk-ului
Regularly check the health status of your hard drive through the NVR's menu. If the hard drive shows errors or is nearing its end of life, consider replacing it to prevent data loss. You may also need to format the hard drive periodically, which will erase all recorded data.
6.3 Curățare
Clean the exterior of the NVR with a soft, dry cloth. Do not use liquid cleaners or aerosols. Ensure ventilation openings are free from dust and debris.
7. Depanare
| Problemă | Cauza posibila | Soluţie |
|---|---|---|
| Nu se afișează video pe monitor | Conexiune slăbită a cablului, sursă de intrare incorectă pe monitor, NVR-ul nu este pornit. | Check HDMI/VGA cable connections. Ensure monitor is set to correct input. Verify NVR power. |
| Nicio imagine de cameră | Camera not powered, network issue, camera not added/activated. | Check PoE cable connection. Ensure camera is powered. Verify camera IP address and add it to the NVR. |
| Nu se poate înregistra videoclipul | No hard drive, hard drive not formatted, hard drive full, recording schedule not set. | Install and format a hard drive. Check hard drive status. Configure recording schedule. |
| Accesul de la distanță nu funcționează | NVR not connected to internet, incorrect network settings, Hik-Connect account issue. | Verify NVR network connection. Check network settings (IP, DNS). Ensure NVR is added to Hik-Connect. |
8. Specificații
| Caracteristică | Caietul de sarcini |
|---|---|
| Numărul de model | DS-7604NI-K1/4P |
| Marca | Hikvision |
| Tehnologia de conectivitate | Ethernet |
| Dispozitive compatibile | Camera foto |
| Dimensiuni produs (L x l x H) | 8.5 x 29.8 x 42.1 cm |
| Capacitate de stocare a memoriei | 6 TB |
| Dimensiunea hard diskului | 6 TB |
| Numărul de canale | 4 |
| Greutatea articolului | 2.2 lire sterline |
| Digital Video Media Format | Hard Disk |
| Intrare audio | RCA |
| Total porturi USB | 2 |
| Intrare video | VGA, HDMI |
| Număr de unități | 1.0 număr |
| Producător | Hikvision |
| Număr de identificare comercială globală | 06954273652883 |
| Numărul piesei | KNVRDS7604NI-K1/4P |
9. Garanție și asistență
For warranty information, technical support, and service inquiries, please refer to the official Hikvision website or contact your authorized Hikvision dealer. Keep your purchase receipt as proof of purchase for warranty claims.
Resurse online: Visit the official Hikvision support page for FAQs, downloads, and contact information.


