
1. Introducere
This manual provides detailed instructions for the safe and effective operation of your BENNING CM 12 True RMS Digital Power Clamp Multimeter. Please read this manual thoroughly before using the device and keep it for future reference. The BENNING CM 12 is designed for demanding measurement tasks in industrial and commercial environments, offering precise measurements of AC, AC+DC True RMS, inrush current, and more, with data logging and Bluetooth connectivity.
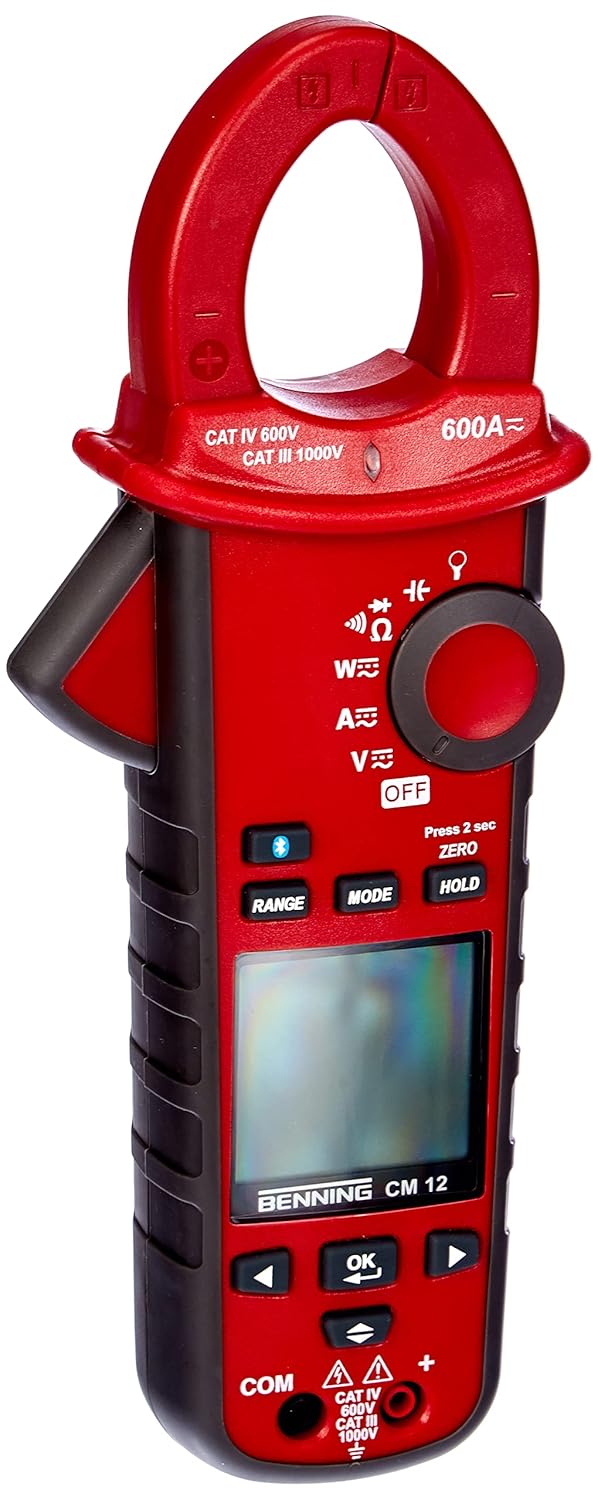
Figura 1: The Benning CM 12 True RMS Digital Power Clamp Multimeter. This image displays the main unit with its red casing, clamp jaw, display screen, and control buttons.
2. Informații de siguranță
Respectați întotdeauna următoarele măsuri de siguranță pentru a preveni vătămările corporale și deteriorarea instrumentului:
- Nu utilizați aparatul de măsură dacă pare deteriorat sau dacă izolația cablurilor de testare este compromisă.
- Asigurați-vă că ați selectat funcția și intervalul corect înainte de a efectua măsurători.
- Nu depășiți limitele maxime de intrare pentru nicio funcție.
- Aveți grijă când lucrați cu voltagpeste 30V AC RMS, 42V peak sau 60V DC, deoarece acestea prezintă un pericol de electrocutare.
- Deconectați întotdeauna alimentarea circuitului și descărcați toate curentul de mare tensiune.tagcondensatoarele înainte de a efectua teste de rezistență, continuitate, diode sau capacitate.
- Respectați codurile de siguranță locale și naționale.
3. Componentele produsului
The BENNING CM 12 package includes the following items:
- BENNING CM 12 Digital Power Clamp Multimetrul
- Cabluri de testare (roșu și negru)
- Baterii AAA (6 incluse)
- Husă de transport
- Manual de utilizare (acest document)
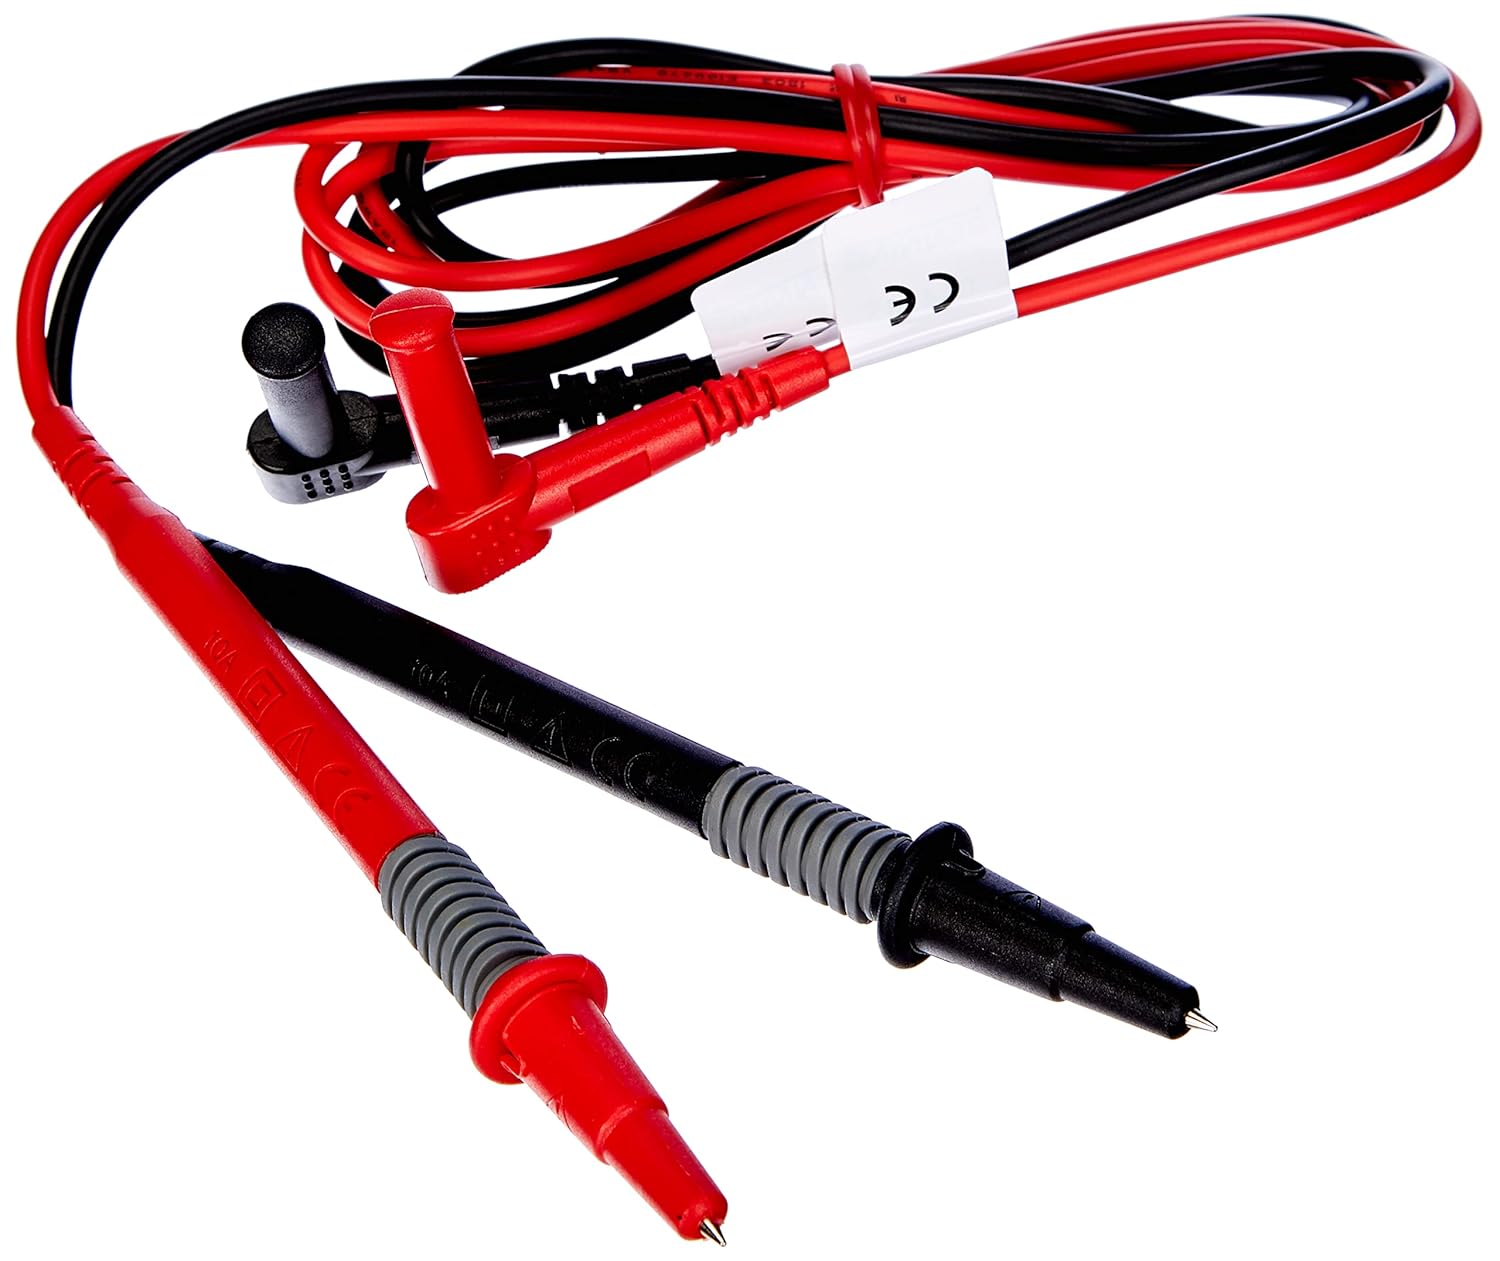
Figura 2: Red and black test leads. These leads are used for voltage, resistance, continuity, and other measurements.

Figura 3: Six AAA batteries. These batteries power the Benning CM 12 multimeter.

Figura 4: Black carrying case. This case provides protection and portability for the multimeter and its accessories.
4. Configurare
4.1. Instalarea bateriei
- Localizați capacul compartimentului bateriei din spatele dispozitivului.
- Folosiți o șurubelniță pentru a deschide compartimentul bateriei.
- Insert six (6) AAA batteries, ensuring correct polarity as indicated inside the compartment.
- Puneți la loc capacul compartimentului bateriei și fixați-l cu șurubul.
4.2. Pornirea inițială
Turn the rotary switch to any measurement function (e.g., V~ for AC Voltage) to power on the device. The display will illuminate, indicating the device is ready for use.
5. Instrucțiuni de utilizare
The BENNING CM 12 offers a variety of measurement functions. Select the desired function using the rotary switch.
5.1. Măsurarea curentului AC/DC (Clamp Funcţie)
- Turn the rotary switch to the 'A~' (AC Current) or 'A=' (DC Current) position.
- Apăsați clamp trăgaciul pentru a deschide maxilarul.
- Închideți un singur conductor cu clamp maxilar. Asigurați-vă că maxilarul este complet închis.
- Citiți valoarea curentă de pe afișaj.
- For AC+DC True RMS measurements, ensure the appropriate mode is selected if available via the MODE button.
5.2. ZbortagMăsurare (AC/DC)
- Insert the red test lead into the 'VΩ' input jack and the black test lead into the 'COM' input jack.
- Turn the rotary switch to 'V~' (AC Voltage) sau 'V=' (Volumul DCtagși).
- Conectați sondele de testare în paralel cu circuitul sau componenta testată.
- Citiți voltage valoarea pe display.
5.3. Resistance and Continuity Measurement
- Asigurați-vă că circuitul este dezactivat înainte de măsurare.
- Insert test leads as for voltage măsurare.
- Turn the rotary switch to 'Ω' (Resistance/Continuity).
- Conectați sondele de testare la componentă.
- For continuity, the meter will beep if resistance is below approximately 30Ω - 100Ω.
5.4. Testul diodelor
- Asigurați-vă că circuitul este dezactivat.
- Insert test leads as for voltage măsurare.
- Turn the rotary switch to the 'Diode' symbol.
- Conectați firul roșu la anod și firul negru la catodul diodei. O tensiune directătage drop (approx. 0.8V) will be displayed. Reverse the leads for an open circuit reading.
5.5. Măsurarea curentului de pornire
This function measures the initial surge of current when a device (e.g., motor, lamp) is first turned on.
- Turn the rotary switch to the 'A~' position.
- Press the 'INRUSH' button (if dedicated) or activate via 'MODE' button.
- Clamp the meter around the power conductor of the device.
- Turn on the device to measure the inrush current.
5.6. Power Measurement (W) and Power Factor
The BENNING CM 12 can simultaneously detect current (A) and voltage (V) to calculate active power (W) and power factor in AC/DC networks.
- Turn the rotary switch to the 'W' (Power) position.
- Connect the test leads for voltage measurement and clamp the jaw around the current conductor.
- The display will show active power (W) and power factor.
5.7. Data Logger Function (LOG) and Bluetooth Interface
The device features a data logger capable of storing 10,000 readings with a sampling rate from 1 second to 10 minutes. It also includes a Bluetooth interface for data connection to smartphones or tablets via the "BENNING MM-CM Link" app.
- Download and install the "BENNING MM-CM Link" app from your device's app store (iOS and Android compatible).
- Activate Bluetooth on your smartphone/tablet and on the BENNING CM 12 (refer to the device's specific button for Bluetooth activation, usually a dedicated button or a long press of 'MODE').
- Pair the device with the app.
- Use the app to configure logging parameters (sampling rate, start/stop logging) and to view/export recorded data.
5.8. Low-Pass Filter (HFR)
The HFR (High-Frequency Rejection) low-pass filter is used for accurate measurements on clocked motor drives or other noisy environments by filtering out high-frequency interference.
- Activate the HFR filter via a dedicated button or by pressing the 'MODE' button in relevant measurement functions (e.g., AC Voltage or Current).
- The display will typically show an indicator when the filter is active.
5.9. Total Harmonic Distortion (THD) Measurement
The THD function assesses network quality by measuring the total harmonic distortion of voltage or current waveforms.
- Select the THD function using the rotary switch or 'MODE' button in AC Voltage/Current modes.
- Connect the meter as appropriate for voltage sau măsurarea curentului.
- The display will show the THD value.
5.10. Two-Pole Rotary Field Testing
This function is used to determine the phase sequence in three-phase systems.
- Turn the rotary switch to the 'Rotary Field' symbol (if dedicated) or select via 'MODE' button in a relevant AC voltage funcția.
- Connect the test leads to two phases of the three-phase system.
- The display will indicate the phase sequence (e.g., L1-L2, L2-L3).
6. Întreținere
6.1. Curatenie
Ștergeți carcasa cu reclamăamp o lavetă și un detergent blând. Nu utilizați substanțe abrazive sau solvenți. Asigurați-vă că dispozitivul este oprit și deconectat de la orice circuit înainte de curățare.
6.2. Înlocuirea bateriei
When the low battery indicator appears on the display, replace the batteries as described in Section 4.1. Remove batteries if the device will not be used for an extended period to prevent leakage.
6.3. Depozitare
Store the multimeter in its carrying case in a cool, dry environment, away from direct sunlight and extreme temperatures. Remove batteries for long-term storage.
7. Depanare
| Problemă | Cauza posibila | Soluţie |
|---|---|---|
| Contorul nu pornește. | Baterii descărcate sau instalate incorect. | Verificați polaritatea bateriilor; înlocuiți bateriile. |
| Nicio citire sau este afișat mesajul „OL” (supraîncărcare). | Incorrect range selected, open circuit, or measurement exceeds range. | Select appropriate range, check circuit connections, ensure measurement is within device limits. |
| Citiri inexacte. | Poor test lead connection, external interference, or low battery. | Ensure secure connections, move away from strong electromagnetic fields, replace batteries. |
| Probleme de conexiune Bluetooth. | Bluetooth not activated on device/phone, app issues, or out of range. | Ensure Bluetooth is on for both devices, restart app, move closer to the meter. |
8. Specificații
| Caracteristică | Detaliu |
|---|---|
| Numărul de model | CM 12 |
| Tip de măsurare | True RMS (AC, AC+DC) |
| Curent de aprindere | Da |
| Încărcați Profile Înregistrare | Yes (single-phase and three-phase) |
| Măsurarea puterii | Active Power (W), Power Factor |
| Test de continuitate | 30 Ω - 100 Ω |
| Testul diodei | 0.8 V |
| Rotary Field Testing | Doi poli |
| Filtru trece-jos | HFR (High-Frequency Rejection) |
| Harmonic Measurement | THD (distorsiune armonică totală) |
| Logger de date | 10,000 readings, 1s - 10min samprata ling |
| Interfață | Bluetooth (iOS and Android app "BENNING MM-CM Link") |
| Sursa de alimentare | 6 baterii AAA (incluse) |
| Dimensiunile produsului | 11.42 x 5.12 x 2.76 inci |
| Greutatea articolului | 1.3 lire sterline (590 grame) |
| Producător | Benning |

Figura 5: Dimensional view of the Benning CM 12 Multimeter, indicating its approximate height of 11 inches (27 cm).
9. Informații despre garanție
BENNING products are manufactured to high-quality standards. For specific warranty terms and conditions, please refer to the warranty card included with your product or visit the official BENNING webPăstrați dovada achiziției pentru reclamații în garanție.
10. Asistență pentru clienți
If you encounter any issues or have questions regarding your BENNING CM 12, please contact BENNING customer support. You can find contact information on the official BENNING website-ul sau prin distribuitorul local.
- Website: www.benning.de (Vă rugăm să verificați pentru regiunea dvs.) website)
- E-mail: Consultați website for specific contact emails.
- Telefon: Consultați website for specific contact numbers.