
1. Introducere
This manual provides detailed instructions for the installation, operation, and maintenance of your Tiandy TC-NR4008M7-S2 Network Video Recorder (NVR). This NVR is designed for IP surveillance systems, supporting up to 8 channels at 1080P resolution, and features advanced video analysis and smart recording capabilities. It is ONVIF compatible, ensuring broad compatibility with various IP cameras.
Vă rugăm să citiți cu atenție acest manual înainte de a utiliza produsul pentru a asigura o funcționare corectă și sigură.
2. Informații de siguranță
To prevent electrical hazards and ensure safe operation, observe the following precautions:
- Do not disassemble the equipment yourself. Disassembly and maintenance of the equipment must be carried out by qualified professionals.
- Ensure the NVR is connected to a grounded power source to prevent electric shock.
- Avoid exposing the NVR to moisture, rain, or extreme temperatures.
- Nu blocați orificiile de ventilație. Asigurați o circulație adecvată a aerului în jurul unității.
- Folosiți doar adaptorul de alimentare furnizat împreună cu NVR-ul.
Imaginea 2.1: Rear panel of the NVR showing various ports and a caution label. The label warns against self-disassembly due to electrical hazard and states that maintenance should be performed by professionals.
3. Produs terminatview
The Tiandy TC-NR4008M7-S2 NVR is a robust solution for managing your IP surveillance cameras. Key features include:
- Intrare cu 8 canale: Supports up to 8 IP camera channels.
- 1080P Resolution: Records video at up to 1080P resolution.
- Depozitare: Accommodates two 3.5-inch SATA hard drives, each up to 4TB (hard drives not included).
- Ieșiri video: HDMI and VGA for local display.
- Porturi USB: Two USB ports for mouse and data backup.
- Caracteristici avansate: Video Analysis and Smart Recording capabilities.
- Conectivitate: Port Ethernet pentru conexiune la rețea.
- Audio & Alarm: Supports audio input/output and alarm functions.
- Compatibilitate ONVIF: Ensures interoperability with ONVIF-compliant IP cameras.
3.1 Panoul frontal

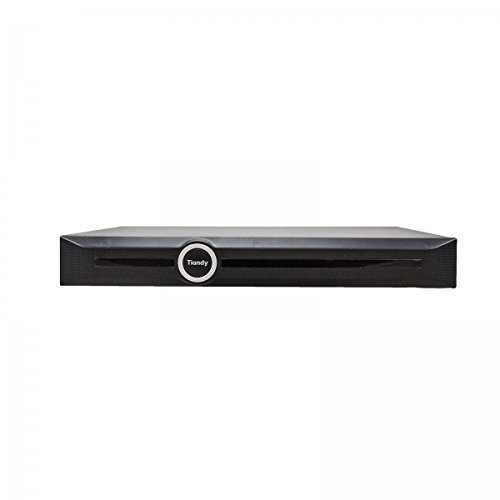
Imaginea 3.1: Faţă view of the Tiandy TC-NR4008M7-S2 NVR. The front panel typically includes status indicators and the brand logo.
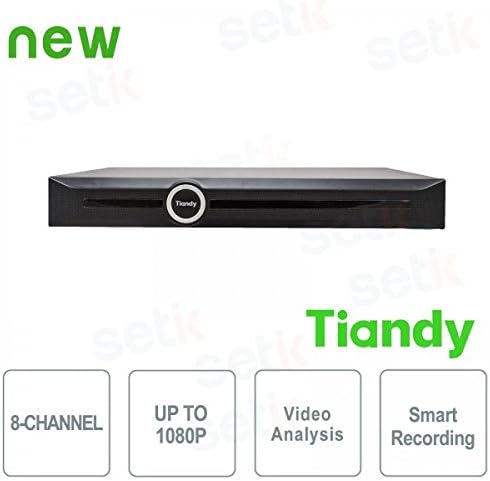
Imaginea 3.2: Faţă view of the Tiandy NVR with graphical indicators for 8-Channel support, Up to 1080P resolution, Video Analysis, and Smart Recording.
3.2 Panoul din spate
The rear panel provides all necessary connection ports for the NVR:
- Putere de intrare: Pentru conectarea adaptorului de alimentare.
- Port Ethernet: RJ45 port for network connection to IP cameras and the internet.
- Ieșire HDMI: Pentru conectarea la un monitor sau televizor HDMI.
- Ieșire VGA: Pentru conectarea la un monitor VGA.
- Porturi USB: Two USB ports for mouse connection and external storage.
- Intrare/Ieșire audio: Pentru conectarea dispozitivelor audio externe.
- Intrare/Ieșire alarmă: Pentru conectarea dispozitivelor de alarmă externe.
Imaginea 3.3: Detailed rear panel of the NVR, illustrating the layout of the power input, Ethernet port, HDMI, VGA, USB ports, audio, and alarm connections.
4. Configurare
4.1 Instalarea hard diskului
The NVR supports two 3.5-inch SATA hard drives (not included). It is recommended to use surveillance-grade hard drives for optimal performance and reliability. To install:
- Opriți NVR-ul și deconectați toate cablurile.
- Remove the NVR's cover by unscrewing the retaining screws.
- Mount the hard drives into the designated bays using the provided screws.
- Connect the SATA data and power cables from the NVR motherboard to the hard drives.
- Puneți la loc capacul și fixați-l cu șuruburile.
Nota: SSDs may not have dedicated mounting slots and might require alternative securing methods if used.
4.2 Conexiuni inițiale
- Conectați un monitor la portul de ieșire HDMI sau VGA al NVR-ului.
- Conectați mouse-ul USB inclus la unul dintre porturile USB ale NVR-ului.
- Conectați NVR-ul la rețea folosind un cablu Ethernet.
- Conectați adaptorul de alimentare la NVR și apoi la o priză.
- Porniți NVR-ul.
4.3 Prima configurare
La prima pornire, NVR-ul vă va ghida printr-un asistent de configurare inițială. Acesta include de obicei:
- Configurarea parolei de administrator.
- Formatting the installed hard drives.
- Network settings configuration (DHCP or static IP).
- Setări de oră și dată.
- Adding IP cameras (the NVR should be able to recognize and connect to ONVIF-compatible cameras).
5. Operare
5.1 În direct View
After successful setup, you can access the live view of your connected cameras through the NVR's local interface. The live view is designed to be fluid and responsive.
5.2 Configurare înregistrare
NVR-ul acceptă diverse moduri de înregistrare:
- Înregistrare continuă: Înregistrări 24/7.
- Înregistrare detectare mișcare: Records only when motion is detected by the cameras.
- Înregistrare programată: Înregistrări în perioade de timp specifice.
- Înregistrare alarmă: Records when an alarm event is triggered.
Access the recording settings through the NVR's menu to configure your preferred recording schedule and modes for each channel.
5.3 Video Analysis and Smart Recording
The NVR includes advanced video analysis features. These can be configured to trigger recordings or alarms based on specific events, such as line crossing, intrusion detection, or object removal. Smart Recording optimizes storage by adjusting recording parameters based on event types.
5.4 Acces la distanță (aplicație mobilă)
NVR-ul acceptă acces la distanță viewing and management via a mobile application, such as 'Easy Live Plus'. To use the app:
- Download the 'Easy Live Plus' app from your smartphone's app store.
- Înregistrați un cont și conectați-vă.
- Add your NVR to the app using its serial number or QR code.
Nota: While the app provides remote access, some users have reported limitations in its functionality and configuration options compared to the local NVR interface. It is recommended to configure detailed settings directly on the NVR.
6. Întreținere
6.1 Gestionarea hard disk-ului
Regularly check the status of your hard drives through the NVR's storage management menu. You may need to:
- Format Hard Drives: If you install new drives or encounter recording issues, formatting can resolve problems. This will erase all data on the drive.
- Replace Hard Drives: If a hard drive fails or reaches its end of life, replace it following the installation steps in Section 4.1.
6.2 Actualizări de software
Periodically check the Tiandy official website for firmware updates. Firmware updates can improve performance, add new features, and fix bugs. Follow the instructions provided with the firmware update package carefully.
6.3 Curățare
Keep the NVR clean and free from dust. Use a soft, dry cloth to wipe the exterior. Ensure ventilation openings are not obstructed by dust buildup. Do not use liquid cleaners directly on the unit.
7. Depanare
Această secțiune abordează problemele frecvente pe care le puteți întâmpina cu NVR-ul dumneavoastră.
7.1 Fără ieșire video
- Check if the monitor is properly connected to the HDMI or VGA port.
- Asigurați-vă că monitorul este pornit și setat la sursa de intrare corectă.
- Verify that the NVR is powered on and its status indicators are normal.
7.2 Probleme de înregistrare
- No Recordings: Check if hard drives are installed, formatted, and healthy. Verify recording schedules and motion detection settings.
- Setările nu se salvează: If settings revert to default, especially after using the mobile app, try configuring settings directly on the NVR's local interface. Ensure the NVR's firmware is up to date.
- Calitate slabă a înregistrării: Check camera resolution settings and NVR recording parameters. Ensure sufficient bandwidth for IP cameras.
7.3 Network and Remote Access Problems
- Ensure the Ethernet cable is securely connected to the NVR and your router/switch.
- Verify network settings (IP address, gateway, DNS) on the NVR.
- For remote access, ensure your NVR has internet access and port forwarding (if required by your network setup) is correctly configured on your router.
- If using the mobile app, ensure the app is updated to the latest version.
7.4 NVR Not Powering On
- Check the power cable connection to the NVR and the power outlet.
- Asigurați-vă că adaptorul de alimentare funcționează corect.
- Încercați o priză diferită.
8. Specificații
| Caracteristică | Caietul de sarcini |
|---|---|
| Numărul de model | TC-NR4008M7-S2 |
| Marca | Tiandy |
| Canale | 8 Canale IP |
| Rezoluție Max | 1080P (Full HD) |
| Suport HDD | 2 x 3.5" SATA HDD, up to 4TB each (8TB total) |
| Ieșiri video | 1 x HDMI, 1 x VGA |
| Porturi USB | 2 x USB |
| Interfata retea | 1 x RJ45 Ethernet |
| Audio | Audio In/Out support |
| Alarma | Alarm In/Out support |
| Caracteristici | Video Analysis, Smart Recording, ONVIF Compatible |
| Greutatea articolului | 2.8 kg |
| Dispozitive compatibile | Smartphone (pentru acces de la distanță) |
9. Garanție și asistență
For warranty information, please refer to the warranty card included with your product or contact your point of purchase. For technical support, please contact Tiandy customer service or your authorized dealer. Ensure you have your product model number (TC-NR4008M7-S2) and purchase details available when seeking support.