
1. Introducere
This manual provides instructions for the safe and effective operation of the ALLOSUN EM420B Digital Multimeter. This compact 3 1/2 digit digital multimeter is designed for measuring DC and AC voltage, DC and AC current, resistance, temperature, diode, transistor, continuity, and capacitance. It features polarity indication, data hold, MAX mode, overrange indication, and automatic power-off. Please read this manual thoroughly before use.
2. Informații de siguranță
AVERTIZARE:
- Asigurați-vă întotdeauna că multimetrul este setat la funcția și intervalul corect înainte de a efectua măsurători.
- Do not exceed the maximum input values for any range. Maximum operating voltage este 1000 volți.
- Procedați cu mare precauție atunci când lucrați cu circuite sub tensiune.
- Verificați cablurile de testare pentru a depista eventualele deteriorări înainte de fiecare utilizare. Nu utilizați dacă izolația este compromisă.
- Înlocuiți bateriile imediat ce apare indicatorul de baterie descărcată pentru a asigura citiri precise.
- Nu utilizați multimetrul dacă pare deteriorat sau nu funcționează corect.
- Refer to the manual for specific CAT rating information and appropriate usage environments.
3. Produs terminatview
The ALLOSUN EM420B Digital Multimeter is a versatile tool for electrical measurements. Below is an image illustrating its main components.

Figura 3.1: Față view of the ALLOSUN EM420B Digital Multimeter, showing the LCD display, rotary function switch, and input terminals.
3.1 Afișare
The multimeter features a 3 1/2 digit backlight LCD with a maximum reading of 1999. It updates 2-3 times per second.

Figure 3.2: Close-up of the LCD display, indicating measurement values and units.
3.2 Controls and Terminals
- Comutator rotativ: Folosit pentru a selecta funcțiile și intervalele de măsurare.
- Buton FUNC: Selects between different functions within a single rotary switch position (e.g., AC/DC, Diode/Continuity).
- Butonul RANGE: Selectează manual intervalul de măsurare sau activează setarea automată a intervalului.
- MAX/H Button: Activates MAX mode (displays maximum reading) or Data Hold (freezes current reading). Press for 2 seconds for MAX mode.
- DATA H Button: Activates Data Hold function.
- Buton pentru iluminare de fundal: Activează iluminarea de fundal a afișajului.
- INPUT Terminal: Positive input for most voltagmăsurători de e, rezistență și capacitate.
- Terminal COM: Intrare comună (negativă) pentru toate măsurătorile.
- 10A Terminal: Intrare pentru măsurători de curent mare (până la 10A).
- mA/µA Terminal: Input for low current (mA/µA) measurements.
4. Configurare
4.1 Instalarea bateriei
The multimeter is powered by three 1.5V AAA batteries (not provided). To install or replace batteries:
- Asigurați-vă că multimetrul este oprit și că sondele de testare sunt deconectate.
- Localizați compartimentul bateriilor pe spatele unității.
- Folosiți o șurubelniță pentru a deschide capacul compartimentului bateriei.
- Insert three AAA batteries, observing correct polarity (+ and -).
- Puneți la loc capacul compartimentului bateriei și fixați-l cu șurubul.

Figura 4.1: Spate view of the multimeter, highlighting the battery compartment.
Un indicator de baterie descărcată va apărea pe afișaj atunci când bateriile trebuie înlocuite.
5. Instrucțiuni de utilizare
5.1 Funcționare generală
- To turn on the multimeter, rotate the function switch from OFF to the desired measurement function.
- The multimeter features automatic power-off to conserve battery life. It will power off after a period of inactivity.
- To turn off, rotate the function switch to OFF.
5.2 Măsurarea DC Voltage (V=)
- Insert the red test lead into the "INPUT" jack and the black test lead into the "COM" jack.
- Set the rotary switch to the "V=" position.
- Conectați sondele de testare la componenta sau circuitul care urmează să fie măsurat.
- Citiți voltage value on the display. The polarity will be indicated.
5.3 Măsurarea AC Voltage (V~)
- Insert the red test lead into the "INPUT" jack and the black test lead into the "COM" jack.
- Setați comutatorul rotativ în poziția „V~”.
- Conectați sondele de testare la priza de curent alternativtage sursa.
- Citiți voltage valoarea pe display.
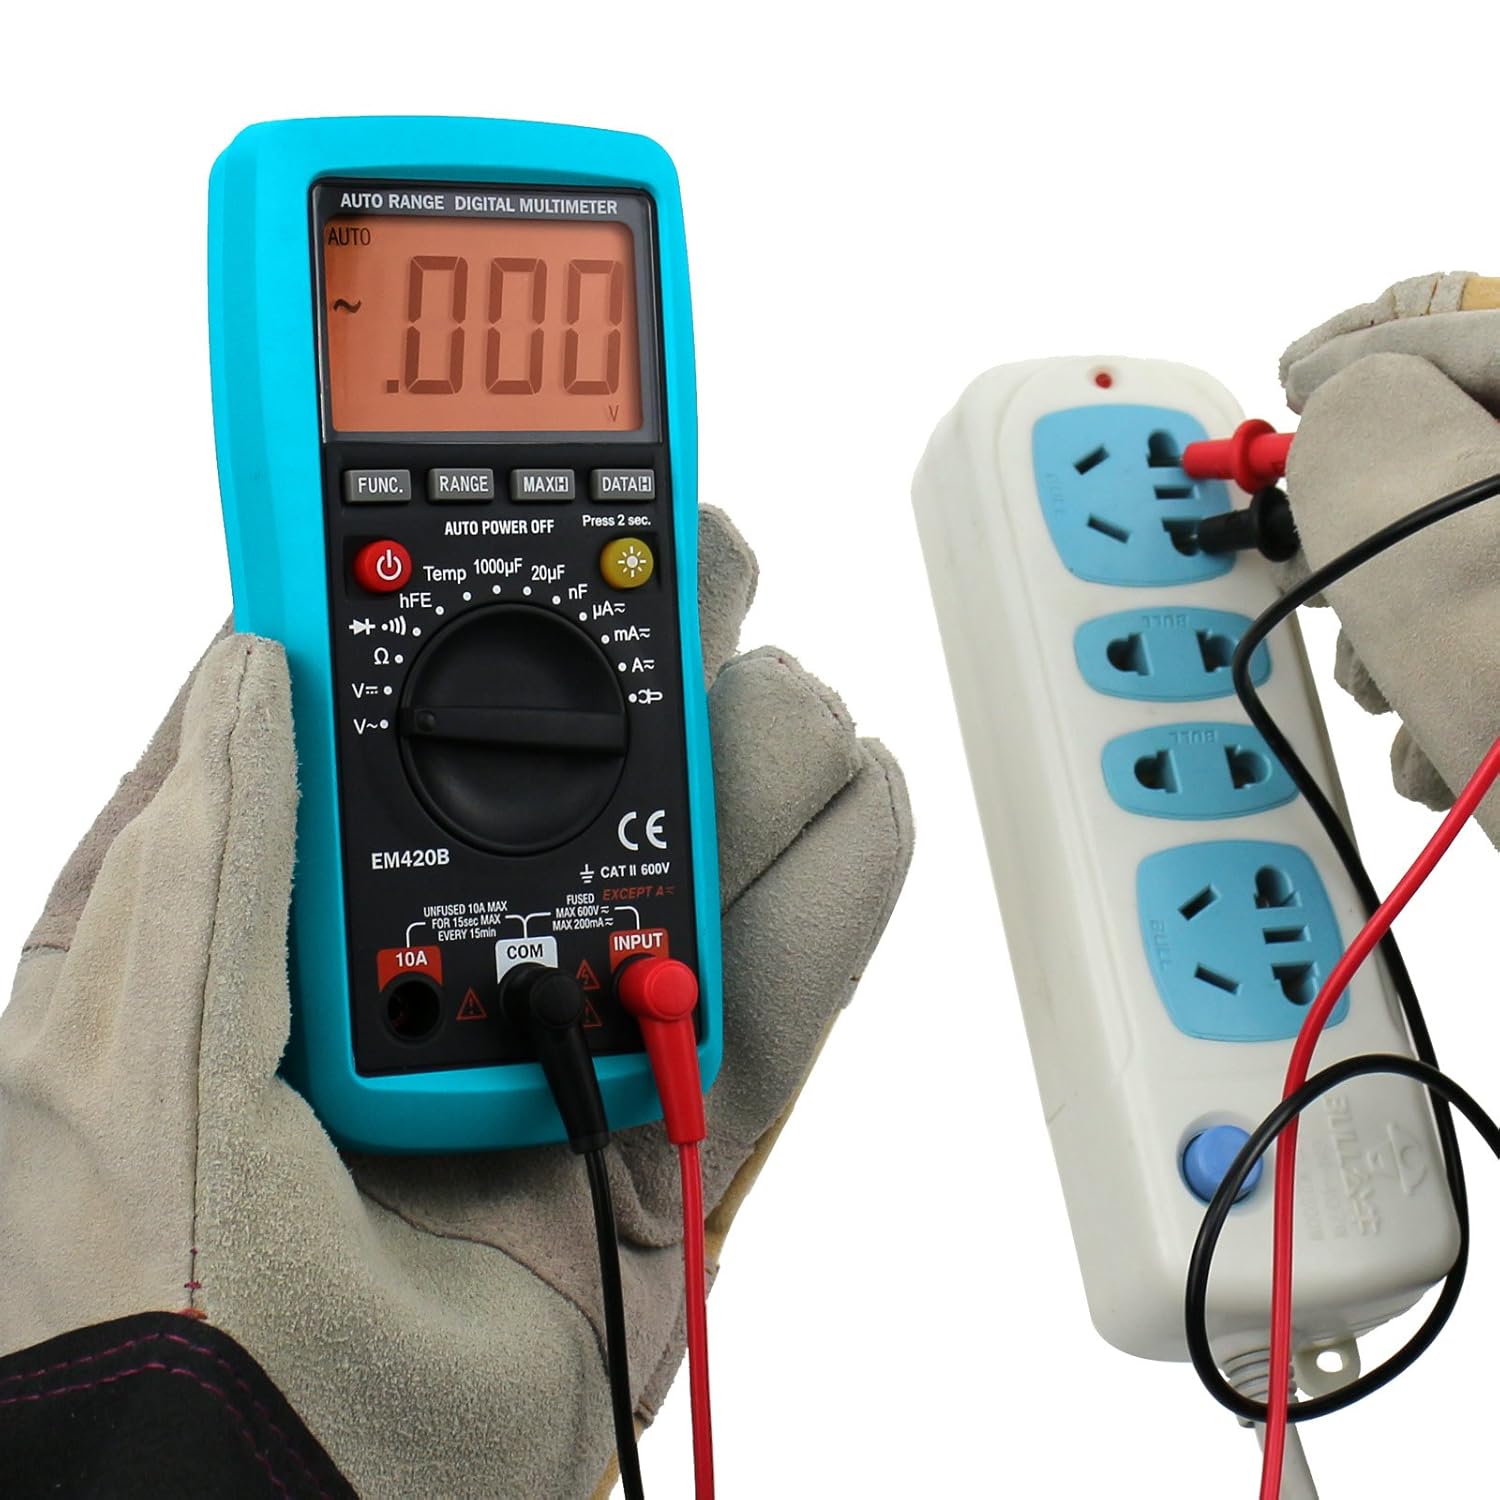
Figura 5.1: Măsurarea volumului de curent alternativtagde la o priză de curent.
5.4 Measuring DC Current (A=, mA=, µA=)
ATENȚIE: Nu conectați niciodată multimetrul în paralel cu un vol.tage source when measuring current, as this can damage the meter or blow the fuse.
- Determine the expected current range. For currents up to 10A, use the "10A" jack. For lower currents, use the "mA/µA" jack. The black lead always goes into "COM".
- Set the rotary switch to the appropriate "A=", "mA=", or "µA=" position.
- Întrerupeți circuitul și conectați multimetrul în serie cu sarcina.
- Citiți valoarea curentă de pe afișaj.
5.5 Measuring AC Current (A~, mA~, µA~)
ATENȚIE: Nu conectați niciodată multimetrul în paralel cu un vol.tagsursă electronică la măsurarea curentului.
- Determine the expected current range. For currents up to 10A, use the "10A" jack. For lower currents, use the "mA/µA" jack. The black lead always goes into "COM".
- Set the rotary switch to the appropriate "A~", "mA~", or "µA~" position.
- Întrerupeți circuitul și conectați multimetrul în serie cu sarcina.
- Citiți valoarea curentă de pe afișaj.
5.6 Măsurarea rezistenței (Ω)
- Insert the red test lead into the "INPUT" jack and the black test lead into the "COM" jack.
- Setați comutatorul rotativ în poziția „Ω”.
- Asigurați-vă că circuitul sau componenta este dezactivată înainte de a măsura rezistența.
- Conectați sondele de testare la componentă.
- Citiți valoarea rezistenței pe afișaj.
5.7 Testarea diodei
- Insert the red test lead into the "INPUT" jack and the black test lead into the "COM" jack.
- Set the rotary switch to the "Diode Test" position (indicated by a diode symbol).
- Conectați firul roșu la anod și firul negru la catodul diodei.
- Afișajul va afișa volumul înaintetage drop. Reverse the leads; the display should show "OL" (open loop) for a good diode.
5.8 Test de continuitate
- Insert the red test lead into the "INPUT" jack and the black test lead into the "COM" jack.
- Set the rotary switch to the "Continuity Test" position (indicated by a continuity symbol).
- Conectați sondele de testare la circuit sau la componentă.
- If continuity exists (resistance below approximately 50Ω), the built-in buzzer will sound. The display will show the resistance value.
5.9 Test tranzistor (hFE)
- Setați comutatorul rotativ în poziția „hFE”.
- Insert the transistor (NPN or PNP) into the appropriate sockets of the hFE adapter.
- Citiți valoarea hFE de pe afișaj.

Figure 5.2: Performing a transistor hFE test using the adapter.
5.10 Măsurarea capacității
(Applicable to EM420B model only)
- Insert the red test lead into the "INPUT" jack and the black test lead into the "COM" jack.
- Set the rotary switch to the capacitance range (e.g., "1000µF", "20µF", "200nF").
- Asigurați-vă că condensatorul este complet descărcat înainte de măsurare.
- Conectați sondele de testare la bornele condensatorului.
- Citiți valoarea capacității pe afișaj.
5.11 Funcția de păstrare a datelor
Press the "DATA H" button to freeze the current reading on the display. Press it again to release the hold and resume live readings.
5.12 MAX Mode
Press and hold the "MAX/H" button for 2 seconds to activate MAX mode. The multimeter will display the maximum value measured since the mode was activated. Press again to exit MAX mode.
6. Întreținere
6.1 Curățare
Ștergeți carcasa cu reclamăamp cloth and mild detergent. Do not use abrasives or solvents. Ensure the multimeter is off and disconnected from all circuits before cleaning.
6.2 Înlocuirea bateriei
Refer to Section 4.1 for battery replacement instructions. Always replace all three AAA batteries at the same time with new ones.
6.3 Înlocuirea siguranței
If the current measurement function stops working, the fuse may be blown. Fuse replacement should only be performed by qualified personnel. Refer to the specifications for the correct fuse type and rating.
7. Depanare
| Problemă | Cauza posibila | Soluţie |
|---|---|---|
| Fără afișaj sau afișaj slab iluminat | Baterii descărcate sau descărcate | Înlocuirea bateriilor (Secțiunea 4.1) |
| Se afișează „OL” (Suprasarcină) | Input exceeds selected range or meter's maximum capacity | Select a higher range or ensure input is within meter's limits. |
| Citiri incorecte | Funcție/interval selectat incorect; conexiune slabă a cablurilor de testare; baterie descărcată | Verify settings, check connections, replace batteries. |
| Măsurarea curentului nu funcționează | Siguranță arsă | Înlocuiți siguranța (consultați Secțiunea 6.3). |
8. Specificații
| Parametru | Valoare |
|---|---|
| Afişa | LCD, 1999 de numărări, actualizări de 2-3 ori/sec. |
| Indicație de depășire | "OL" shown on the display |
| Baterie | 3 x 1.5V AAA or equivalent (Not provided) |
| Indicație de polaritate negativă | Negative sign "-" shown automatically |
| Indicație baterie descărcată | Battery symbol shown on the display |
| Temperatura de operare | 0℃ ~ 40℃, <75%RH |
| Temperatura de depozitare | -10℃ ~ 50℃, <85%RH |
| Dimensiuni | 158 x 75 x 35 mm |
| Greutate | Aproximativ 200 g |
| Vol. maxim de operaretage | 1000 volți |
| Accesorii | Manual, Test leads, K-type Thermocouple, Adapter |
9. Garanție și asistență
For warranty information or technical support, please refer to the documentation included with your purchase or contact ALLOSUN customer service. Keep your purchase receipt as proof of purchase.