
1. Introducere
This manual provides detailed instructions for the safe and efficient operation of your Crenova XPE350 Mini Portable Projector. Please read this manual thoroughly before using the projector and retain it for future reference. The Crenova XPE350 is designed for home and backyard theater use, offering a compact and portable solution for displaying media from various sources.
2. Produs terminatview
The Crenova XPE350 is a mini portable projector featuring a 480x320 resolution and 150 lumens brightness. Its compact design makes it suitable for various environments. Below are key components and features.
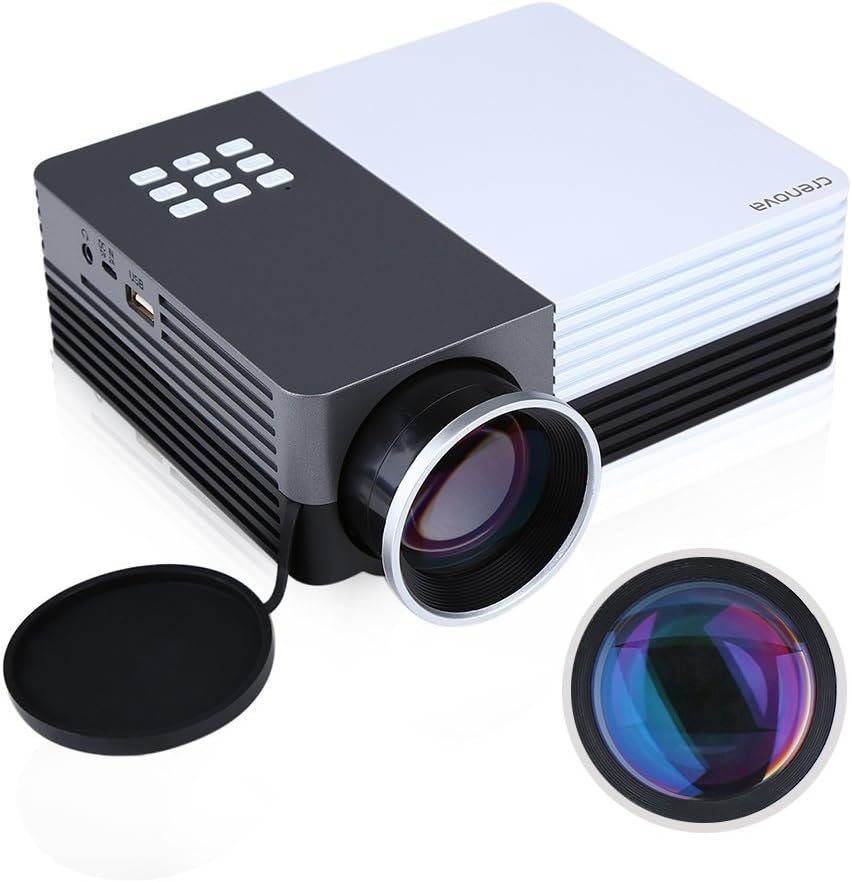
Figura 2.1: Crenova XPE350 Mini Portable Projector. This image shows the overall design of the projector, highlighting its compact form factor and front lens.

Figura 2.2: The Crenova XPE350 projector held in a hand, demonstrating its compact and portable size. A close-up inset highlights the glass lens, indicating clear image projection.
2.3 Conținutul pachetului
La despachetare, verificați dacă toate articolele enumerate mai jos sunt prezente și în stare bună:
- Crenova XPE350 Mini Portable Projector
- Telecomanda
- Adaptor de curent alternativ
- Cablu AV
- Manual de utilizare (acest document)

Figura 2.3: Contents of the Crenova XPE350 Projector package. This image displays the projector, remote control, power adapter, AV cable, and the printed user manual.
2.4 Componentele proiectorului
Familiarize yourself with the various parts of your projector:
- Obiectiv: Proiectează imaginea pe ecran.
- Butoane funcționale: Control basic projector functions.
- Vents: For heat dissipation. Ensure they are not obstructed.
- Porturi de intrare: VGA, HDMI, AV, USB, SD Card Slot.
- Ieșire audio: Mufă pentru căști.
- Ajustare Keystone: Corectează distorsiunea trapezoidală a imaginii.
- Interfață de alimentare: Se conectează la adaptorul de curent alternativ.

Figura 2.4: A închide view of the projector's function buttons, lens, and ventilation vents. These are essential for basic control and maintaining optimal operating temperature.

Figura 2.5: Detaliat view of the Crenova XPE350 projector's various input and output ports, including VGA, HDMI, AV, USB, headphone jack, mobile power input, SD card slot, and power interface. Also visible is the keystone adjustment dial.
3. Configurare
3.1 Conexiune la alimentare
- Connect the AC power adapter to the "Power Interface" port on the projector.
- Conectați celălalt capăt al adaptorului de alimentare la o priză electrică adecvată.
- Indicatorul luminos de alimentare de pe proiector se va aprinde.
3.2 Conectarea surselor de intrare
The Crenova XPE350 supports various input sources. Choose the appropriate connection method for your device:

Figura 3.1: Diagram illustrating various devices that can be connected to the Crenova XPE350 projector, including laptops, desktop computers, DVD players, game consoles, speakers, mobile hard disks, USB drives, SD cards, digital cameras, tablet PCs, and TV set-top boxes.
- HDMI: For high-definition digital video and audio from devices like laptops, game consoles, or streaming sticks.
- VGA: For connecting to computers with a VGA output.
- DE: For connecting older devices using the included AV cable (e.g., DVD players, some game consoles).
- USB: Pentru redarea media fileeste direct de pe o unitate flash USB.
- Card SD: Pentru redarea media files directly from an SD memory card.
- MHL (Mobile High-Definition Link): Some smartphones and tablets with MHL-out function can connect via HDMI for screen mirroring. Note: Most Android smartphones do not support MHL function.

Figura 3.2: Illustration of the MHL (Mobile High-Definition Link) feature, showing how a tablet and smartphone can mirror their screens to the projector. This feature requires the source device to support MHL-out.
3.3 Poziționarea proiectorului
Place the projector on a stable, flat surface. Ensure there is adequate ventilation around the projector to prevent overheating. The distance from the screen will determine the image size.
4. Instrucțiuni de utilizare
4.1 Pornire/Oprire
- Pentru a porni: Press the power button on the projector or the remote control. The projector lamp se va lumina.
- Pentru a opri: Apăsați din nou butonul de alimentare. Proiectorul se va opri.
4.2 Reglarea calității imaginii
- Ajustarea focalizării: Rotate the lens ring (refer to Figure 2.4) until the projected image is clear and sharp.
- Corecție trapezoială: Use the keystone adjustment dial (refer to Figure 2.5) to correct trapezoidal distortion if the projector is not perfectly perpendicular to the screen.
4.3 Selectarea sursei de intrare
After connecting your desired input device, press the "Source" button on the remote control or the projector's function panel to cycle through available input options (HDMI, VGA, AV, USB, SD Card) and select the correct one.
4.4 Media Playback (USB/SD Card)
Insert a USB flash drive or SD card into the respective port. The projector's interface will typically prompt you to select the media type (e.g., Photo, Music, Movie, Text) for playback. Navigate using the remote control's arrow keys and "OK" button.
5. Întreținere
5.1 Curățarea lentilei
Ștergeți ușor lentila proiectorului cu o lavetă moale, fără scame, special concepută pentru suprafețe optice. Nu utilizați produse de curățare abrazive sau forță excesivă, deoarece acest lucru poate zgâria lentila.
5.2 Ventilație
Ensure the projector's ventilation vents (refer to Figure 2.4) are clear of obstructions to allow for proper airflow. Blocked vents can lead to overheating and reduced lamp viaţă.
5.3 Lamp Viaţă
The Crenova XPE350 projector features a long-life lamp, estimated at 20,000 hours under normal operating conditions, thanks to its SmartEco technology.

Figura 5.1: Illustration highlighting the Crenova XPE350 projector's long lamp life of 20,000 hours, supported by SmartEco technology, indicating energy efficiency and durability.
6. Depanare
- Fără putere:
- Asigurați-vă că adaptorul de alimentare este conectat corect atât la proiector, cât și la o priză electrică funcțională.
- Verificați dacă indicatorul luminos de alimentare este aprins.
- Nicio imagine:
- Verify that the correct input source is selected (HDMI, VGA, AV, USB, SD).
- Check all cable connections between the projector and the source device.
- Asigurați-vă că dispozitivul sursă este pornit și emite un semnal.
- Imagine neclară:
- Reglați inelul de focalizare de pe obiectiv până când imaginea este clară.
- Asigurați-vă că suprafața de proiecție este plană și că proiectorul se află la o distanță optimă.
- Imaginea este trapezoidală:
- Use the keystone adjustment dial to correct the image shape.
- Poziționați proiectorul cât mai perpendicular posibil pe ecran.
- Fără sunet:
- Verificați setările de volum atât pe proiector, cât și pe dispozitivul sursă.
- If using external speakers, ensure they are properly connected to the headphone jack and powered on.
- For HDMI connections, ensure the source device is sending audio.
- Telecomanda nu funcționează:
- Asigurați-vă că nu există obstrucții între telecomandă și receptorul IR al proiectorului.
- Înlocuiți bateriile din telecomandă.
7. Specificații
| Caracteristică | Caietul de sarcini |
|---|---|
| Model | XPE350 |
| Marca | Crenova |
| Rezoluţie | 480x320 |
| Luminozitate | 150 lumeni |
| Lamp Viaţă | 20,000 hours (SmartEco) |
| Caracteristica specială | Portabil |
| Factor de formă | Portabil |
| Tip de montare | Suport de masă |
| Greutatea articolului | 2.45 lire sterline |
| Dimensiuni pachet | 11.2 x 7.1 x 4.4 inci |
| Culoare | 150 Lumens-Black |
8. Garanție și asistență
For warranty information or technical support, please refer to the documentation included with your purchase or contact Crenova customer service. Keep your purchase receipt as proof of purchase for warranty claims.
For further assistance, please visit the official Crenova website-ul sau contactați canalele lor de asistență.