
1. Introducere
This manual provides comprehensive instructions for the installation, operation, and maintenance of your Hertz HDP4 4-Channel 1000W Max D-Class AmpVă rugăm să citiți cu atenție acest manual înainte de a încerca instalarea sau utilizarea pentru a asigura funcționarea corectă și siguranța.
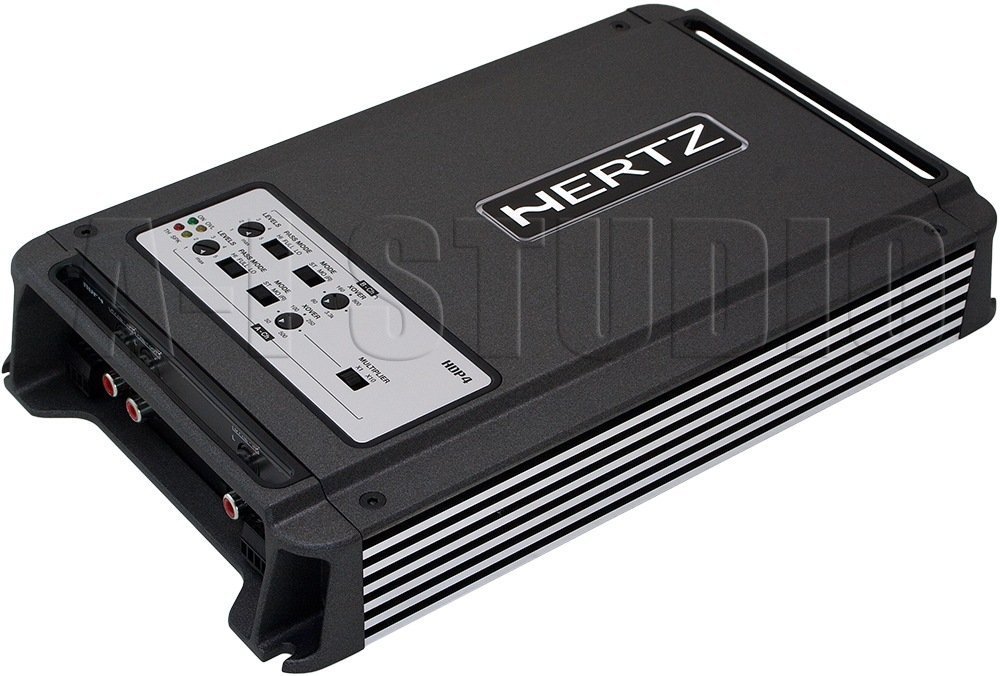
Figura 1.1: Înclinat de sus în jos view of the Hertz HDP4 amplifier, showcasing c-ul său negru compactasing and control panel on the top surface. The Hertz logo is visible on the main body.
2. Informații de siguranță
Respectați întotdeauna următoarele măsuri de siguranță:
- Disconnect the vehicle's battery before any installation or wiring.
- Asigurați-vă că toate cablurile sunt izolate corespunzător pentru a preveni scurtcircuitele.
- Montați amplifier securely in a well-ventilated area, away from moisture and direct heat.
- Folosiți cabluri cu secțiunea corespunzătoare pentru conexiunile de alimentare și împământare, așa cum este specificat în secțiunea de instalare.
- Consultați un instalator profesionist dacă nu sunteți sigur de vreo parte a procesului de instalare.
3. Conținutul pachetului
Verificați dacă toate articolele sunt prezente în colet:
- Hertz HDP4 Amplifier Unit
- Elemente de montare (șuruburi, console)
- Manual de utilizare (acest document)
4. Configurare și instalare
4.1 Montarea Ampmai în viață
Choose a suitable location for mounting the amplifier. It should be a dry, well-ventilated area, protected from direct sunlight and excessive vibration. Ensure there is sufficient space around the ampdispozitiv de filtrare pentru circulația aerului.

Figura 4.1: Sus view of the Hertz HDP4 amplifier, illustrating its compact design and potential mounting points. The amplifier features a textured black finish with the Hertz logo prominently displayed.
- Așezați amplifier in the desired mounting location and mark the screw holes.
- Drill pilot holes if necessary, ensuring not to damage any vehicle components.
- Asigurați amplifizer folosind șuruburile de montare furnizate.
4.2 Conexiuni de cablare
Proper wiring is critical for performance and safety. Refer to the diagram below for power, ground, remote, and speaker connections.

Figure 4.2: Rear panel of the Hertz HDP4 amplifier, detailing the power input (BATT), ground (GND), remote turn-on (REM) terminals, and speaker output terminals (L/R mono for channels A and B). Two 40A fuses are also visible.
- Putere (BATT): Connect a fused power cable (minimum 8 AWG recommended) directly from the vehicle's positive battery terminal to the BATT terminal on the ampmai în viață.
- Masa (GND): Connect a ground cable of the same gauge as the power cable from the GND terminal to a clean, unpainted metal point on the vehicle chassis.
- La distanță (REM): Connect a remote turn-on wire from your head unit's remote output to the REM terminal.
- Ieșiri difuzoare: Connect your speakers to the appropriate L (left) and R (right) terminals for each channel (A and B). Ensure correct polarity. The amplifier supports mono bridging for increased power output to a single speaker or subwoofer.
- Siguranțe: The amplifier is equipped with two 40A fuses. Replace only with fuses of the same type and rating.
4.3 Input Connections and Controls
The amplifier offers both RCA (low-level) and High-Level inputs, along with various crossover and gain controls.

Figure 4.3: Input and control panel of the Hertz HDP4 amplifier. This panel includes RCA pre-inputs (A PRE-IN, B PRE-IN), high-level inputs (A HI-IN, B HI-IN), and various adjustment knobs for levels, pass mode, and crossover settings. A switch for HI-IN AUTO TURN-ON is also present.
- RCA Pre-Inputs (A PRE-IN, B PRE-IN): Connect your head unit's RCA outputs to these inputs for low-level signal.
- High-Level Inputs (A HI-IN, B HI-IN): If your head unit does not have RCA outputs, connect speaker-level signals directly to these inputs. The amplifier features an auto turn-on function for high-level inputs.
- Niveluri: Adjust the input sensitivity (gain) to match the output of your head unit. Start with the gain at minimum and slowly increase until desired volume is achieved without distortion.
- Mod de trecere: Select the desired crossover mode (e.g., Full, HPF, LPF) for each channel pair.
- Crossover Frequency (XOVER): Adjust the frequency point for the selected crossover mode.
- Multiplicator: Use this switch to multiply the crossover frequency setting by 1 or 10, depending on your system requirements.
5. Instrucțiuni de utilizare
5.1 Pornirea inițială
- After all connections are made and verified, reconnect the vehicle's battery.
- Porniți unitatea principală. amplifier should power on automatically (if remote wire is connected or HI-IN AUTO TURN-ON is active).
- Start with the head unit volume low and gradually increase it, listening for clear audio.
5.2 Reglarea setărilor audio
Reglați fin amplifier's settings for optimal sound quality:
- Potrivire de câștig: Reglați amplifier's gain controls (LEVELS) to match the output voltage of your head unit. This is crucial to prevent distortion.
- Setări crossover: Set the crossover frequencies (XOVER) and pass modes (PASS MODE) according to the specifications of your speakers. For full-range speakers, a high-pass filter (HPF) is often used to protect them from low bass frequencies. For subwoofers, a low-pass filter (LPF) is used.
6. Întreținere
To ensure the longevity and optimal performance of your Hertz HDP4 amplifter, urmați aceste instrucțiuni de întreținere:
- curatenie: Curățați periodic ampCurățați exteriorul aparatului cu o cârpă moale și uscată. Nu utilizați substanțe chimice dure sau produse de curățare abrazive.
- Ventilare: Asigurați-vă că amplifier's cooling fins are free from dust and obstructions to maintain proper heat dissipation.
- Conexiuni: Verificați periodic toate conexiunile cablurilor pentru strângerea și coroziune. Conexiunile slăbite pot duce la performanțe slabe sau la deteriorări.
- Siguranțe: If a fuse blows, replace it only with a fuse of the exact same type and rating (2 x 40A). Using an incorrect fuse can cause severe damage to the amplifier or vehicle electrical system.

Figure 6.1: Bottom panel of the Hertz HDP4 amplifier, displaying the serial number label and important caution notes regarding insulated screws. This area should be kept clean and free from obstructions.
7. Depanare
Dacă întâmpinați probleme cu dvs amplifier, consultați tabelul următor înainte de a contacta asistența:
| Problemă | Cauza posibila | Soluţie |
|---|---|---|
| Fără curent / AmpLifierul nu se aprinde | Siguranță arsă, cablu de alimentare/masă/telecomandă slăbit, ieșire defectă a telecomenzii unității principale. | Check and replace fuses. Verify all power, ground, and remote connections are secure. Test remote wire for 12V signal. |
| Fără sunet | Loose RCA/speaker wires, incorrect input selection, amplifier in protection mode, faulty speakers. | Check all signal and speaker connections. Ensure correct input mode is selected. Check for protection light. Test speakers. |
| Sunet distorsionat | Gain set too high, incorrect crossover settings, poor quality audio source, damaged speakers. | Reduce gain. Adjust crossover settings. Test with a different audio source. Inspect speakers for damage. |
| Amplifier Se supraincalzeste | Insufficient ventilation, impedance mismatch, prolonged high-power operation. | Asigurați un flux de aer adecvat în jurul ampVerificați potrivirile impedanței difuzoarelor amplifier's capabilities. Reduce volume or operating time. |
8. Specificații
Technical specifications for the Hertz HDP4 4-Channel 1000W Max D-Class Ampmai în viață:
- Model: HDP4
- Marca: HERTZ
- Tip: 4-Channel D-Class Ampmai în viață
- Putere maxima: 1000W (as per product title, specific RMS not provided in data)
- Dimensiuni produs (L x l x H): 11.18 x 6.73 x 1.83 inci
- Greutate: 6.35 lire sterline
- Voltage: 14.4 volți (în funcțiune)
- Tip de montare: Montare la suprafață
- Siguranțe: 2 x 40A
- ASIN: B00AWBU1FQ
9. Informații despre garanție
Hertz products are designed and manufactured to the highest quality standards. For specific warranty terms and conditions, please refer to the warranty card included with your product or visit the official Hertz webPăstrați bonul fiscal ca dovadă a achiziției pentru reclamații în garanție.
10. Suport
For technical assistance, troubleshooting beyond this manual, or warranty inquiries, please contact Hertz customer support through their official website or authorized dealer. Ensure you have your product model (HDP4) and serial number ready when contacting support.
Official Hertz Website: www.hertzaudiovideo.com