
1. Introducere
Thank you for choosing the Pro'sKit SS-206E Temperature Controlled Soldering Station. This device is designed for precise and efficient soldering tasks, featuring an analog temperature display and an ergonomically designed soldering iron. Please read this manual thoroughly before operation to ensure safe and correct use.
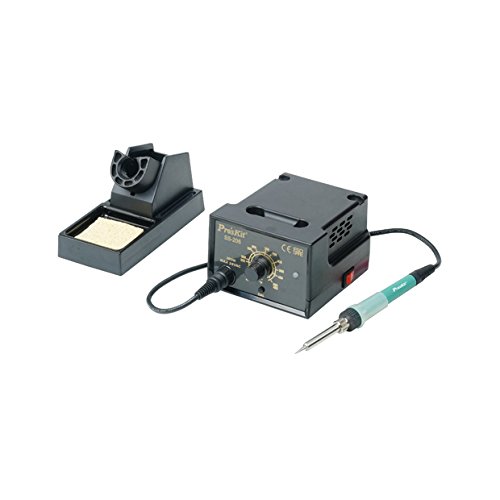
Image 1.1: The Pro'sKit SS-206E Soldering Station, showing the main unit with analog display and the connected soldering iron.
2. Instrucțiuni de siguranță
Respectați întotdeauna următoarele măsuri de siguranță pentru a preveni vătămările corporale sau deteriorarea echipamentului:
- Siguranta electrica: Asigurați-vă că sursa de alimentare corespunde volumuluitage requirements of the unit (110V or 220V). Do not operate with wet hands or in damp medii.
- Risc de căldură: The soldering iron tip reaches very high temperatures. Avoid direct contact with skin or flammable materials. Use the provided soldering iron stand.
- Inhalarea fumului: Lipirea produce vapori. Lucrați întotdeauna într-o zonă bine ventilată sau folosiți un extractor de vapori.
- Protecția ochilor: Wear safety glasses to protect against solder splashes.
- Protecție ESD: This unit is ESD safe. However, take appropriate ESD precautions when working with sensitive electronic components.
- Copii și animale de companie: A nu se lăsa la îndemâna copiilor și a animalelor de companie.
3. Conținutul pachetului
Verificați dacă toate articolele sunt prezente în colet:
- Pro'sKit SS-206E Soldering Station Main Unit
- Soldering Iron with connecting cable
- Suport fier de lipit
- Burete de curățare
- Cablu de alimentare
4. Configurare
- Despacheta: Scoateți cu grijă toate componentele din ambalaj.
- Conectați fierul de lipit: Plug the soldering iron's connector into the designated port on the front panel of the soldering station. Ensure a secure connection.
- Poziție Stand: Place the soldering iron stand on a stable, heat-resistant surface near your workspace. Insert the soldering iron into the stand when not in use.
- Pregătirea buretelui: Dampen the cleaning sponge with water (do not soak) and place it in the sponge tray of the soldering iron stand.
- Conexiune de alimentare: Connect the power cord to the back of the soldering station and then plug it into a suitable electrical outlet. Note: This model is available in 110V and 220V versions. Verify your unit's voltage requirement before plugging it in.
5. Instrucțiuni de utilizare
- Pornire: Flip the power switch located on the front panel to the 'ON' position. The analog display will illuminate.
- Temperatura setată: Rotate the temperature control knob to your desired temperature. The analog meter will indicate the set temperature. The unit supports a temperature range of 200°C to 480°C (392°F to 896°F).
- Celsius/Fahrenheit Adjustment: A switch or internal jumper (refer to specific model documentation if available) allows selection between Celsius and Fahrenheit display.
- Preîncălzire: Allow the soldering iron to preheat for approximately 2-3 minutes until the tip reaches the set temperature.
- Colectarea pontului: Before first use and periodically during operation, apply a small amount of solder to the hot tip. This 'tins' the tip, preventing oxidation and improving heat transfer.
- Lipire: Bring the hot, tinned tip into contact with both the component lead and the PCB pad simultaneously. Apply solder to the joint, not directly to the iron tip. Remove the solder, then the iron, allowing the joint to cool naturally.
- Cleaning the Tip: Regularly wipe the soldering iron tip on the damp sponge to remove excess solder and flux residue.
- Oprire: After use, turn the temperature control knob to its lowest setting, then flip the power switch to 'OFF'. Allow the iron to cool completely in its stand before storing.
6. Întreținere
- Îngrijirea vârfului de lipire: Always keep the tip tinned. Replace tips when they become pitted or heavily oxidized and cannot be cleaned. Use only compatible replacement tips.
- Sponge Maintenance: Păstrați buretele damp during operation. Replace the sponge when it becomes worn or heavily soiled.
- Curățarea unității: Periodically wipe the exterior of the soldering station with a soft, dry cloth. Do not use abrasive cleaners or solvents.
- Verificarea cablului: Regularly inspect the power cord and soldering iron cable for any signs of damage. Replace immediately if damaged.
7. Depanare
| Problemă | Cauza posibila | Soluţie |
|---|---|---|
| Soldering iron not heating | Power switch off; Loose connection; Incorrect voltage; Faulty heating element. | Ensure power is on. Check all cable connections. Verify unit voltage matches outlet. Contact support if heating element is suspected. |
| Poor solder joints | Tip not tinned; Incorrect temperature; Dirty tip; Old solder. | Tin the tip. Adjust temperature. Clean or replace tip. Use fresh solder. |
| Analog display not working | Unit not powered; Internal fault. | Check power connection. If power is on and display is off, contact support. |
| Unitatea nu pornește | Power cord not connected; Outlet fault; Incorrect voltage. | Asigurați-vă că este conectat corect cablul de alimentare. Testați priza cu un alt dispozitiv. Confirm unit voltage (110V or 220V) matches your power supply. |
8. Specificații
- Model: SS-206E
- Vol. De intraretage: AC 110V or 220V (Vol. specifictage depends on the purchased model. Please verify your unit.)
- Interval de temperatură: 200°C - 480°C (392°F - 896°F)
- Tip de afișare: Analogic
- Certificari: CE, ESD Safe
- Componente incluse: Fier de lipit
9. Garanție și asistență
For warranty information and technical support, please refer to the warranty card included with your product or visit the official Pro'sKit webPăstrați bonul fiscal ca dovadă a achiziției.