
1. Introducere
This manual provides essential information for the safe and efficient operation of your SANYO PLC-XK2200 XGA Ultra-Portable Multimedia Projector. Please read this manual thoroughly before using the projector and retain it for future reference.
The SANYO PLC-XK2200 is designed to deliver clear and bright images with 2200 lumens and a 2000:1 contrast ratio, suitable for various presentation environments.
2. Informații de siguranță
- Sursa de alimentare: Use only the specified power supply. Ensure the power cord is securely connected.
- Ventilare: Nu blocați orificiile de ventilație. Asigurați spațiu suficient în jurul proiectorului pentru o circulație adecvată a aerului și pentru a preveni supraîncălzirea.
- Lamp Avertizare: Proiectorul lamp funcționează la temperaturi și presiuni ridicate. Lăsați proiectorul să se răcească înainte de a-l muta sau de a efectua lucrări de întreținere. Nu priviți direct în lentilă atunci când proiectorul esteamp este pornit.
- Expunerea la lichid: Do not expose the projector to rain, moisture, or liquids.
- Service: Apelați pentru toate lucrările de service la personal de service calificat. Nu încercați să deschideți sau să reparați singur proiectorul.
3. Produs terminatview
3.1 Comenzile panoului superior
The top panel provides access to essential controls for power, menu navigation, focus, and zoom adjustments.

Imagine: Sus view of the SANYO PLC-XK2200 projector. Visible controls include the focus and zoom rings, the power button, and buttons for menu navigation (Menu, Select, Volume, Auto Setup, Lamp Resetare).
3.2 Conexiuni la panoul din spate
The rear panel houses various input and output ports for connecting external devices.

Imagine: Spate view of the SANYO PLC-XK2200 projector. Ports visible include Control Port, Computer In 1 (S-Video In/Component In), Computer In 2 (Monitor Out), Video In, Audio In/Out, and a network port.
3.3 Side and Bottom Views
Latura view shows the power input and ventilation, while the bottom view reveals mounting points and product labels.
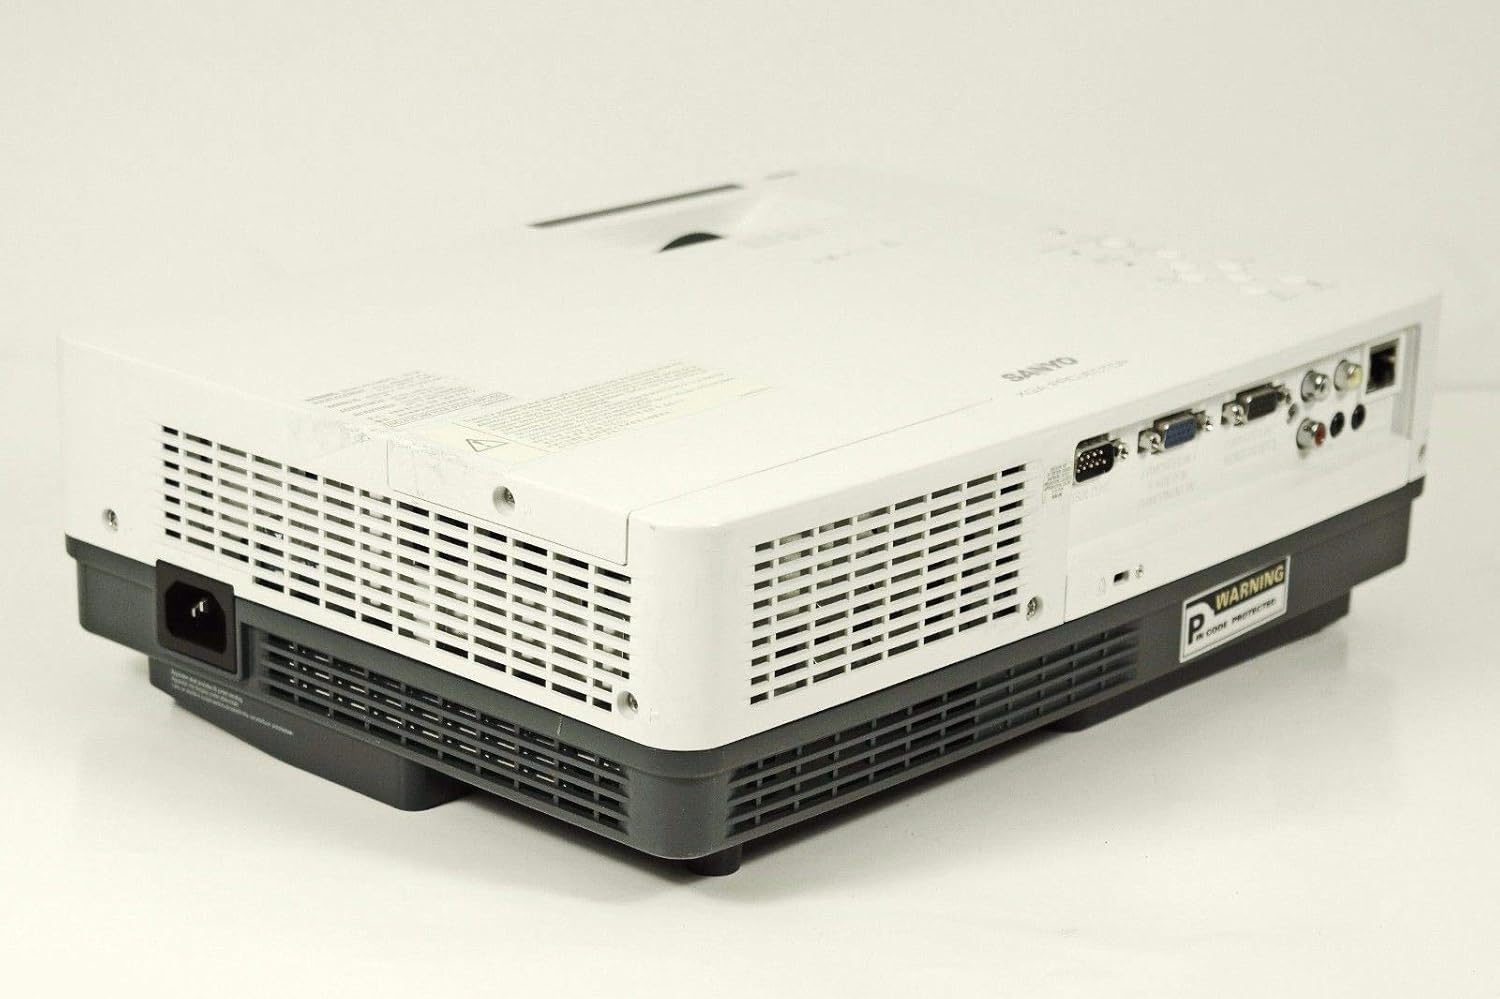
Imagine: Laterală view of the SANYO PLC-XK2200 projector, highlighting the power input socket and exhaust vents.

Imagine: Jos view of the SANYO PLC-XK2200 projector, displaying screw holes for mounting, ventilation grilles, and the product information label.
4. Configurare
4.1 Amplasarea proiectorului
Place the projector on a stable, flat surface or mount it securely. Ensure there is sufficient space around the projector for ventilation. Avoid placing it in direct sunlight or near heat sources.
4.2 Conectarea puterii
- Connect the power cord to the AC inlet on the projector.
- Conectați celălalt capăt al cablului de alimentare la o priză cu împământare.
- The power indicator light will illuminate, typically in amber, indicating standby mode.
4.3 Conectarea surselor de intrare
Connect your video source (e.g., computer, DVD player) to the appropriate input port on the projector's rear panel. The PLC-XK2200 supports various inputs including VGA (Computer In 1/2), S-Video, and Composite Video.
- Calculator: Use a VGA cable to connect your computer's video output to the COMPUTER IN 1 or COMPUTER IN 2 port.
- Dispozitive video: For S-Video, connect to the S-VIDEO IN port. For composite video, connect to the VIDEO IN port using an RCA cable.
- Audio: Connect audio cables from your source device to the AUDIO IN ports if you wish to use the projector's internal speaker or audio output.
5. Instrucțiuni de utilizare
5.1 Pornire/Oprire
- Pentru a porni: Press the POWER button on the projector's top panel or remote control. The power indicator will turn green, and the lamp se va lumina.
- Pentru a opri: Press the POWER button twice. The projector will enter cooling mode, and the power indicator will flash amber. Once cooled, it will return to standby mode (solid amber).
5.2 Ajustarea imaginii
- Focus: Rotate the FOCUS ring on the lens until the image is sharp and clear.
- Zoom: Rotate the ZOOM ring on the lens to adjust the image size.
- Corecție trapezoială: Use the AUTO SETUP button or navigate through the menu to adjust vertical keystone distortion, which corrects trapezoidal images.
5.3 Selectarea intrării
Press the INPUT button on the projector or remote control to cycle through available input sources (e.g., Computer 1, Computer 2, Video, S-Video).
5.4 Navigare prin meniu
Press the MENU button to access the on-screen display (OSD) menu. Use the arrow buttons to navigate and the SELECT button to confirm choices. Press MENU again to exit.
6. Întreținere
6.1 Curățarea proiectorului
- Exterior: Folosiți o cârpă moale și uscată pentru a curăța partea proiectorului.asing. For stubborn dirt, dampen the cloth with a mild detergent solution.
- Obiectiv: Gently wipe the lens with a lens cleaning cloth or lens paper. Avoid harsh chemicals or abrasive materials.
- filtru de aer: Regularly clean the air filter to maintain proper ventilation and prevent overheating. Refer to the filter cover for removal instructions.
6.2 Lamp Înlocuire
Lamp are o durată de viață finită. Când lamp indicator illuminates or the image becomes dim, the lamp may need replacement. Always allow the projector to cool completely before attempting lamp replacement. Consult a qualified technician for lamp replacement if you are unsure.
Avertizare: High pressure lamp. Risk of explosion if improperly handled. Refer to the service manual for detailed lamp proceduri de înlocuire.
7. Depanare
| Problemă | Cauza posibila | Soluţie |
|---|---|---|
| Nu este afișată nicio imagine | Incorrect input selected; loose cable connection; projector in standby. | Press INPUT to select correct source; check cable connections; press POWER button to turn on. |
| Imaginea este neclară | Focalizarea nu este reglată; proiectorul este prea aproape/departe de ecran. | Adjust the FOCUS ring; reposition the projector or use the ZOOM ring. |
| Imaginea este trapezoidală | Proiectorul nu este perpendicular pe ecran. | Use Auto Vertical Keystone correction or manually adjust. |
| Proiectorul se supraîncălzește și se oprește | Ventilație blocată; filtru de aer murdar. | Ensure clear airflow around vents; clean or replace air filter. |
8. Specificații

Imagine: Laterală view of the SANYO PLC-XK2200 projector, displaying the model number label (MODEL NO. PLC-XK2200).
- Nume model: PLC-XK2200
- Marca: SANYO
- Tehnologia de afișare: LCD
- Luminozitate: 2200 lumeni
- Raport de contrast: 2000:1
- Rezoluție nativă: XGA (1024 x 768)
- Raport de aspect: 4:3 (nativ)
- Factor de formă: Portabil
- Tip de montare: Suport de masă
- Terminale de intrare: VGA (x2), S-Video, Composite Video, Audio In (RCA)
- Terminale de ieșire: VGA (Monitor Out), Audio Out (RCA)
- Port de control: RS-232C
- UPC: 086483079498
9. Garanție și asistență
For warranty information, please refer to the warranty card included with your product or contact your local SANYO dealer. Technical support may be available through authorized service centers.
No official product videos were provided in the input data for this manual.