
1. Introducere
This manual provides detailed instructions for the installation, operation, and maintenance of your AZZA Solano 1000R CSAZ-1000R Full Tower Computer Case. Please read this manual thoroughly before beginning installation to ensure proper setup and to maximize the performance and longevity of your system components.
2. Caracteristicile produsului
- Management termic optimizat: Features multiple fans for superior cooling, including a 230mm top fan, a 230mm side fan, two 140mm front fans, and a 120mm rear fan.
- Bottom-Mounted Power Supply: Designed for improved thermal separation and stability, allowing installation facing up or down.
- Management avansat al cablurilor: Pre-drilled motherboard tray and ample space behind for organized cable routing, enhancing airflow and aesthetics.
- Tool-Less Design: Thumb screws for easy installation of optical drives and hard disk drives.
- I/O frontal convenabil: USB and audio ports, along with an eSATA port, located on the top panel for easy access.
- Interior spatios: Full tower design accommodates large components, including extended graphics cards and tall CPU coolers.
- Design estetic: Black exterior with a vibrant red painted interior and red LED fans.
3. Conținutul pachetului
Vă rugăm să verificați dacă toate articolele sunt prezente în coletul dumneavoastră:
- AZZA Solano 1000R CSAZ-1000R Full Tower Case
- Cutie de accesorii (care conține șuruburi, distanțiere, coliere de cablu etc.)
- Manual de utilizare (acest document)
4. Componenta pesteview
4.1 Externe Views
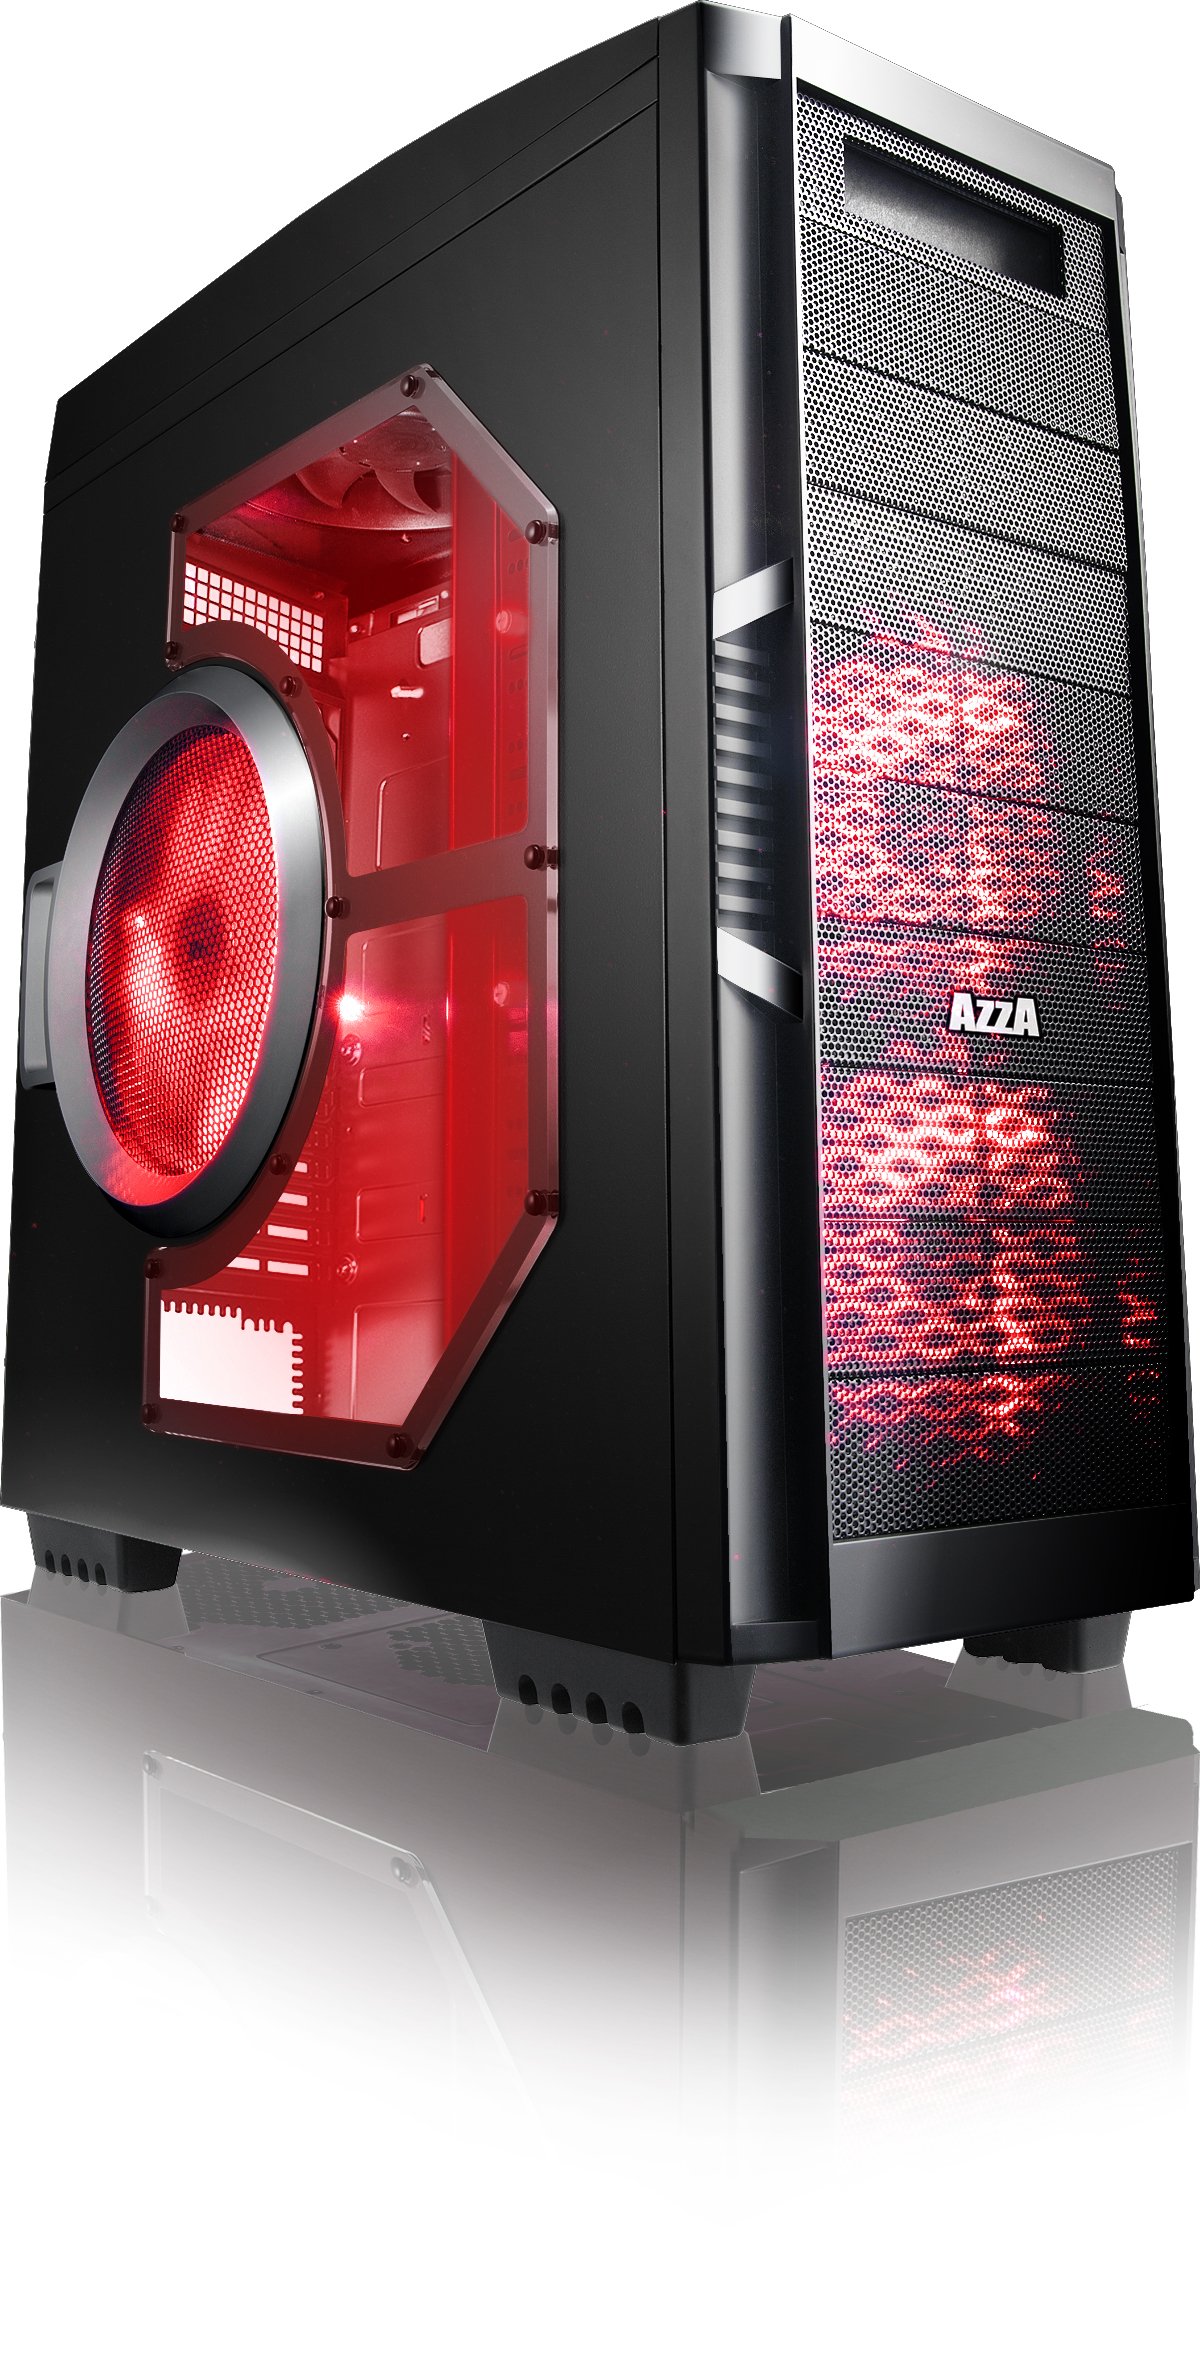
Figura 4.1: Partea frontală view of the AZZA Solano 1000R case, showcasing the red LED fans on the front and side panel.

Figura 4.2: Față view of the AZZA Solano 1000R case, highlighting the two 140mm red LED intake fans behind the mesh panel.

Figura 4.3: lateral view of the AZZA Solano 1000R case, showing the large 230mm red LED side panel fan and the transparent window.

Figura 4.4: Înclinat în față-sus view of the AZZA Solano 1000R case, showing the top ventilation grille, front I/O panel with USB and audio ports, and power button.
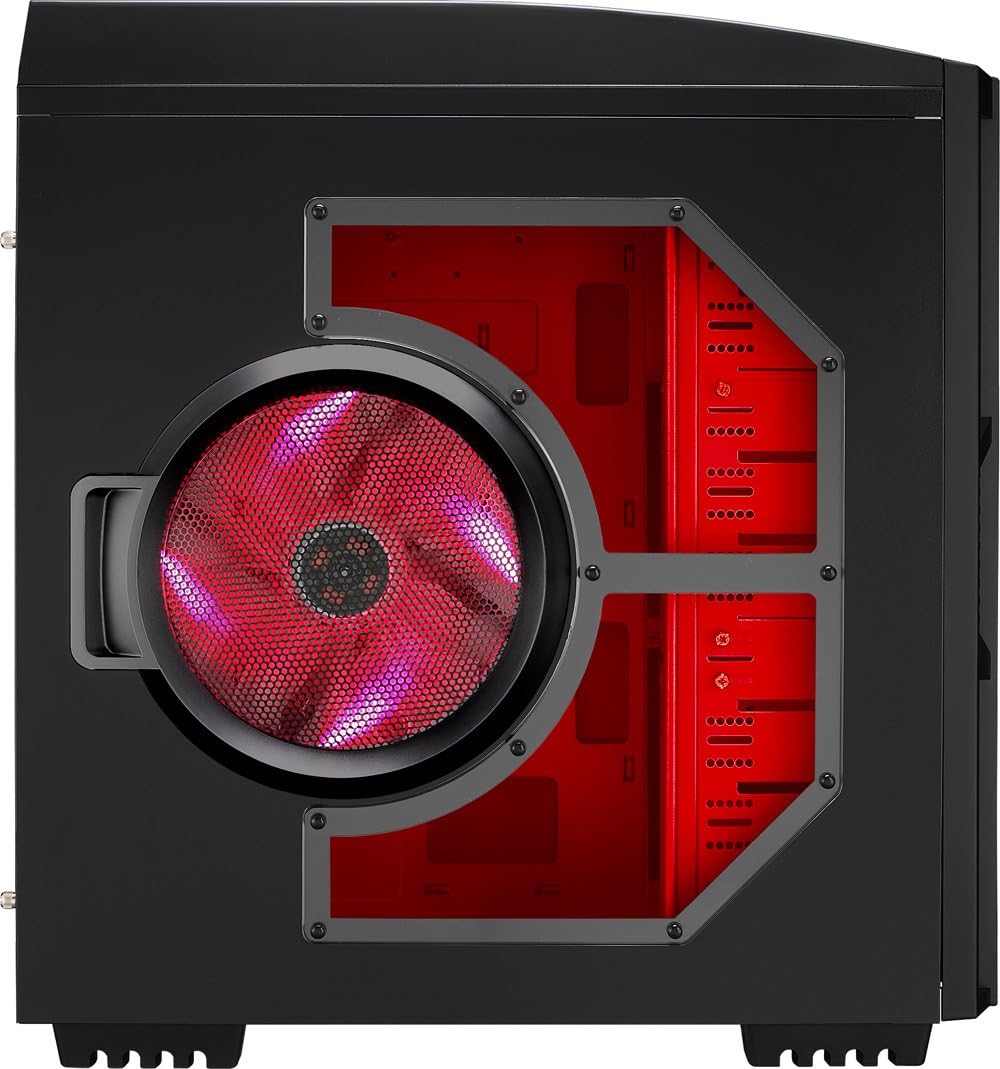
Figura 4.5: Partea din spate view of the AZZA Solano 1000R case, displaying the red interior, rear exhaust fan, and expansion slots.
4.2 Intern Views

Figura 4.6: Interior view of the AZZA Solano 1000R case with the left side panel removed, revealing the red painted motherboard tray, drive bays, and cable routing cutouts.

Figure 4.7: Angled interior view of the AZZA Solano 1000R case, focusing on the multiple 5.25" and 3.5" drive bays.

Figure 4.8: Angled interior view of the AZZA Solano 1000R case, showing the rear 120mm exhaust fan, expansion slots, and the extensive drive bay structure.

Figura 4.9: Interior view of the AZZA Solano 1000R case with the right side panel removed, showing the space behind the motherboard tray for cable management.
5. Ghid de instalare
Înainte de a începe instalarea, asigurați-vă că spațiul de lucru este curat și fără electricitate statică. Se recomandă purtarea unei curele antistatice la încheietura mâinii.
5.1 Pregătirea cazului
- Așezați carcasa pe o suprafață plană și stabilă.
- Remove the side panels by unscrewing the thumb screws at the rear of the case and sliding the panels backward.
5.2 Instalarea plăcii de bază
- Install the I/O shield provided with your motherboard into the opening at the rear of the case.
- Align the motherboard with the pre-installed standoffs. If necessary, install additional standoffs according to your motherboard's form factor.
- Carefully place the motherboard onto the standoffs, ensuring the I/O ports align with the shield.
- Fixați placa de bază cu șuruburile corespunzătoare din cutia de accesorii.
5.3 Instalarea sursei de alimentare
- Position the power supply unit (PSU) in the bottom-rear compartment of the case. You can orient it with the fan facing up or down, depending on your cooling preference and PSU design.
- Fixați sursa de alimentare pe carcasă folosind șuruburile furnizate împreună cu sursa de alimentare.
5.4 Instalarea unității de stocare (HDD/SSD)
- For 3.5" HDDs, slide the drive into an available drive bay until it clicks into place. Use the provided thumb screws for additional security if desired.
- For 2.5" SSDs, an adapter bracket (not included) may be required to fit into the 3.5" bays. Secure the SSD to the adapter, then install the adapter into a 3.5" bay.
- Connect the SATA data and power cables to your installed drives.
5.5 Optical Drive Installation
- Remove the desired 5.25" front bay cover from the case.
- Slide the optical drive into the bay from the front until it aligns with the screw holes.
- Secure the optical drive using the provided thumb screws.
- Connect the SATA data and power cables to the optical drive.
5.6 Instalarea plăcii de expansiune
- Scoateți capacele sloturilor de expansiune necesare din spatele carcasei.
- Insert your graphics card or other expansion card into the appropriate PCIe/PCI slot on your motherboard.
- Secure the card with the provided screw or tool-less latch mechanism.
5.7 Managementul cablurilor
Utilize the cutouts and space behind the motherboard tray to route and organize your cables. This improves airflow and gives your build a cleaner appearance. Use cable ties from the accessory box to bundle cables.
5.8 Connecting Front Panel I/O
Connect the front panel cables (USB, Audio, Power Switch, Reset Switch, Power LED, HDD LED) to the corresponding headers on your motherboard. Refer to your motherboard manual for exact header locations.
6. Funcționare
6.1 Pornire/Oprire
Press the power button located on the top panel to turn your system on or off. A power LED will illuminate when the system is active.
6.2 Controlul ventilatorului
The case features a fan speed control switch (L/M/H) at the rear, primarily for the top, side, and rear fans. Adjust this switch to balance cooling performance and noise levels according to your preference.
7. Întreținere
7.1 Curățare
Regular cleaning helps maintain optimal airflow and component longevity.
- Exterior: Ștergeți suprafețele exterioare cu un material moale, damp pânză. Evitați curățarea abrazivă.
- Filtre de praf: The case includes mesh filters at the bottom. Periodically remove and clean these filters to prevent dust buildup.
- Interior: Use compressed air to remove dust from inside the case, especially from fans and heatsinks. Ensure the system is powered off and unplugged before cleaning the interior.
8. Depanare
- Sistemul nu pornește: Ensure all power cables (24-pin ATX, 8-pin CPU, GPU power) are securely connected. Verify the PSU switch is in the 'ON' position. Check front panel power switch connection to the motherboard.
- Ventilatoarele nu se învârt: Check fan power connections to the motherboard or fan controller. Ensure the fan speed switch is not set to 'Off' or 'Low' if fans are not spinning at all.
- Side Panel Not Closing: If a large CPU cooler or tall components prevent the side panel from closing, especially due to the side fan, consider relocating the side fan to the exterior of the panel if possible, or ensure your cooler fits within the case's clearance specifications.
- Cable Management Difficulty: If the rear panel bulges due to thick cables, try rerouting cables more efficiently or using flatter cables where possible.
9. Specificații
| Caracteristică | Detaliu |
|---|---|
| Numărul de model | CSAZ-1000R |
| Tipul cazului | Turn complet |
| Culoare | Negru/Roșu |
| Dimensiuni produs (L x l x H) | 19.7 x 8.1 x 21.5 inchi (500 x 206 x 546 mm) |
| Greutatea articolului | 24 lire (10.89 kg) |
| Metoda de răcire | Aer |
| Tip de montare a sursei de alimentare | Montare de jos |
| Total porturi USB | 2 (USB 2.0) + 1 (eSATA) |
| Suport pentru formatul hard disk-ului | 3.5 inchi |
| Ventilatoare incluse | 2x 230mm (Top, Side), 2x 140mm (Front), 1x 120mm (Rear) |
10. Garanție și asistență
Pentru informații despre garanție și asistență tehnică, vă rugăm să consultați site-ul oficial AZZA. website-ul web sau contactați distribuitorul local. Păstrați dovada achiziției pentru a putea solicita garanție.