
1. Introducere
This manual provides detailed instructions for the safe installation, operation, and maintenance of your Emerald P401TSW 6-inch Recessed Ceiling Light Fixture Kit. Please read all instructions carefully before beginning installation and retain this manual for future reference. Proper installation is crucial for safety and optimal performance.
2. Informații de siguranță
WARNING: RISK OF ELECTRIC SHOCK. Disconnect power at the circuit breaker or fuse box before installation or servicing. Failure to do so may result in serious injury or death.
- Toate conexiunile electrice trebuie să fie în conformitate cu codurile locale, ordonanțele și Codul Electric Național (NEC).
- Consultați un electrician calificat dacă nu sunteți sigur de procedurile de cablare.
- Purtați ochelari de protecție și mănuși în timpul instalării.
- Asigurați-vă că dispozitivul este împământat corespunzător.
- Do not install insulation within 3 inches of the fixture housing.
- Acest corp de iluminat este conceput pentru utilizare în interior, în condiții uscate sau uscate.amp numai locații.
3. Conținutul pachetului
Verificați dacă toate componentele sunt prezente înainte de a începe instalarea:
- Recessed Housing (1)
- White Trim Ring (1)
- Frosted Glass Diffuser (1)
- Elemente de montare (șuruburi, piulițe de sârmă)
- Manual de instrucțiuni (acest document)
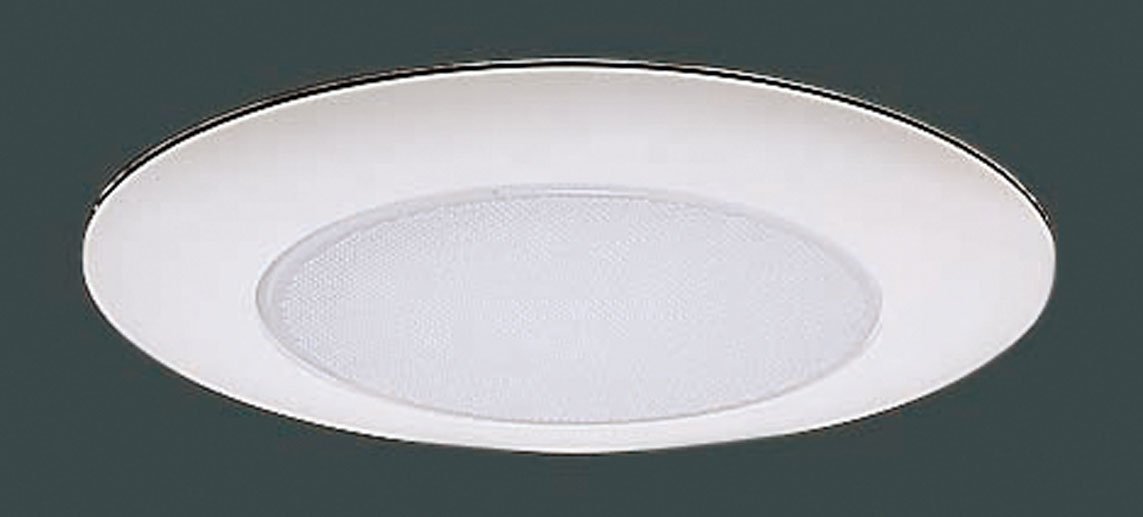
Image: Components of the Emerald P401TSW recessed light kit, showing the housing, white trim, and frosted glass diffuser.
4. Instrumente necesare
Următoarele unelte sunt de obicei necesare pentru instalare:
- Șurubelniță cu cap Phillips
- Șurubelniță cu cap plat
- Dispozitive de dezimbrare
- Bandă de măsurare
- Creion
- Drill with Hole Saw (6-1/4 inch recommended for a snug fit)
- Utility Knife (optional, for drywall)
- Ochelari de siguranță
5. Instrucțiuni de instalare
Follow these steps carefully to install your recessed light fixture. This kit is designed for both new construction and remodel applications.
Pasul 1: Pregătiți-vă pentru instalare
- Opriți alimentarea: Locate the circuit breaker or fuse box controlling the area where you will install the fixture and turn off the power. Verify power is off using a voltage tester.
- Determinați locația: Choose a suitable location on the ceiling, ensuring there are no obstructions (joists, pipes, wires) behind the drywall.
- Mark and cut hole: Using a measuring tape and pencil, mark the center of your desired fixture location. Use a 6-1/4 inch hole saw to cut a circular opening in the drywall. Note: A slightly larger hole (e.g., 6-3/8 inch) may be necessary for easier installation and to prevent drywall damage, as reported by some users. Test fit before final wiring.
Pasul 2: Cablajul dispozitivului
- Open junction box: Open the access plate on the fixture's junction box.
- Conectați firele: Feed the electrical supply wires through the knockout hole into the junction box. Using wire nuts, connect the wires as follows:
- Conectați negru fir (cald) de la alimentare la negru wire of the fixture.
- Conectați alb fir (neutru) de la alimentare la alb wire of the fixture.
- Conectați aramă goală or verde (ground) wire from the supply to the verde ground screw or wire in the junction box.
- Secure wiring: Ensure all connections are secure. Carefully tuck all wires and wire nuts into the junction box and close the access plate.
Step 3: Installing the Housing
- Insert housing: Carefully push the recessed housing up into the ceiling opening.
- Secure housing: The housing features spring clips or tension clips. Push these clips outwards and upwards to secure the housing firmly against the ceiling drywall. Ensure the housing is flush and level with the ceiling surface. If the housing does not sit level, it may require minor adjustment or shimming before proceeding.
Step 4: Installing the Trim and Glass
- Install bulb: Screw in the appropriate bulb (not included) into the socket. Refer to the specifications section for bulb type and wattage.
- Attach glass diffuser: Place the frosted glass diffuser into the trim ring.
- Instalați garnitura: Align the trim ring with the housing. The trim typically has torsion springs or clips that attach to brackets inside the housing. Gently push the trim upwards until it snaps securely into place, flush with the ceiling.
Pasul 5: Ultimii pași
- Restaurați alimentarea: Reconectați alimentarea la întrerupătorul de circuit sau la cutia de siguranțe.
- Test fixture: Turn on the light switch to ensure the fixture is operating correctly.
6. Instrucțiuni de utilizare
Once installed, the Emerald P401TSW recessed light fixture operates like any standard ceiling light. Control it using a wall switch connected to the circuit. To replace the bulb, ensure power is off, allow the bulb to cool, then unscrew the old bulb and screw in a new one of the correct type and wattage.
7. Întreținere
- curatenie: Disconnect power before cleaning. Wipe the trim and glass diffuser with a soft, damp Nu folosiți substanțe de curățare abrazive sau solvenți, deoarece acestea pot deteriora finisajul.
- Înlocuire bec: Always turn off power before replacing a bulb. Allow the bulb to cool completely. Use only bulbs that meet the specifications listed in this manual.
- Inspecţie: Verificați periodic corpul de iluminat pentru a depista orice semne de deteriorare sau conexiuni slăbite. Dacă găsiți probleme, deconectați alimentarea și consultați un electrician calificat.
8. Depanare
| Problemă | Cauza posibila | Soluţie |
|---|---|---|
| Lumina nu se aprinde | Fără putere la fixare Conexiune slăbită Bec defect | Verificați întrerupătorul/siguranța Verificați dacă toate conexiunile firelor sunt sigure (opriți alimentarea) Înlocuiți becul |
| Lumina pâlpâie | Conexiune slăbită Tip incorect de bec Incompatibilitate dimmer | Check wire connections (power off) Asigurați-vă că tipul și puterea becului sunt corectetage Verify dimmer is compatible with bulb type |
| Fixture is not flush with ceiling | Improperly seated clips Hole cut too small | Re-seat spring clips firmly Carefully enlarge hole slightly if necessary (power off) |
9. Specificații
- Model: P401TSW
- Tipul dispozitivului: Recessed Ceiling Light Kit
- Dimensiune: 6-inch (nominal opening)
- Finisaj de tăiere: Alb
- Sticlă: Frosted Diffuser
- Voltage: 120V c.a., 60Hz
- Tip bec: Incandescent, LED, or CFL compatible (bulb not included)
- Max Wattage: 60W (or equivalent LED/CFL)
- Evaluare locație: Uscat sau Damp
10. Informații despre garanție
This Emerald product is covered by a limited warranty against defects in materials and workmanship. Please refer to the warranty card included with your purchase or visit the manufacturer's website for specific terms and conditions. Keep your proof of purchase for warranty claims.
11. Asistență pentru clienți
For technical assistance, missing parts, or warranty inquiries, please contact Emerald customer support. Refer to the packaging or the manufacturer's official website for current contact information (phone number, email, or support portal).