
Introducere
This manual provides detailed instructions for the installation, operation, and maintenance of your DB DRIVE A3 2250.5 Okur Series A3 Class AB 1000 Watt 5-Channel Amplifier. Please read this manual thoroughly before attempting installation or operation to ensure proper use and to prevent damage to the unit or your vehicle's audio system.
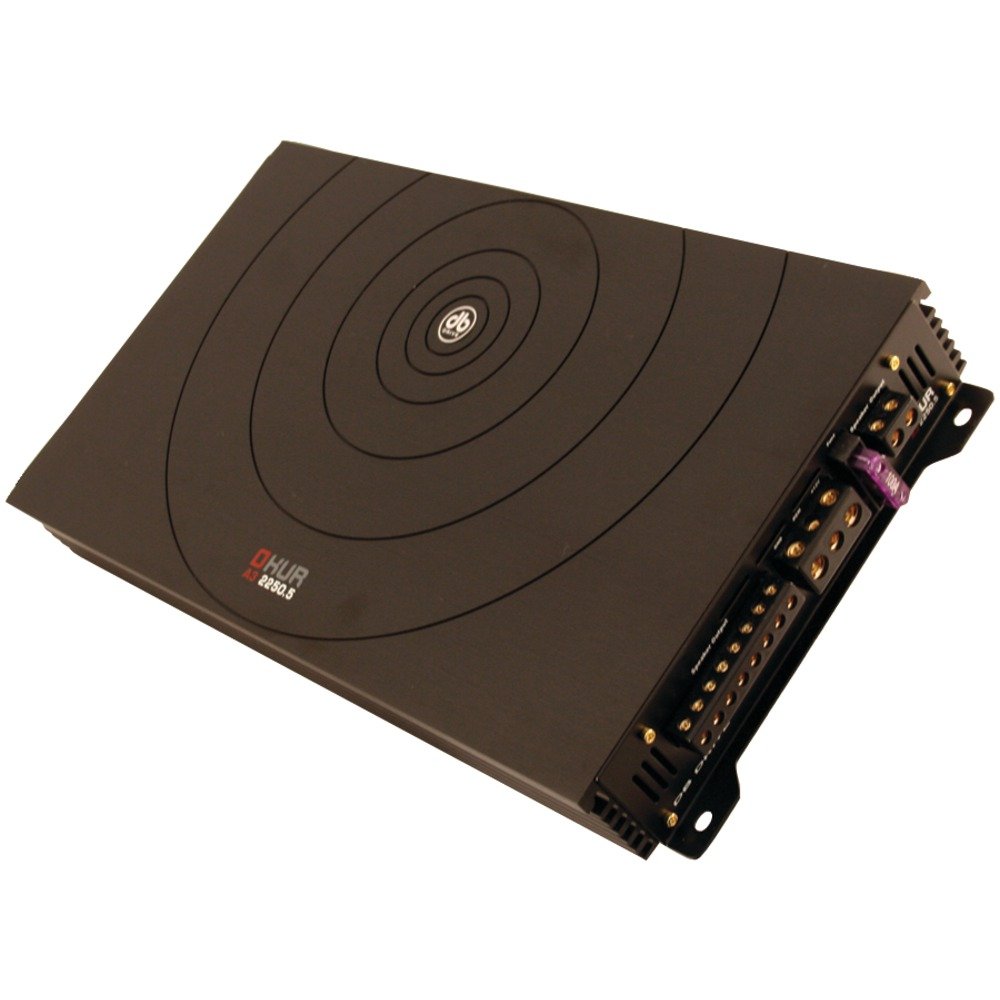
Image: DB DRIVE A3 2250.5 Okur Series A3 Class AB 1000 Watt 5-Channel AmpAceastă imagine arată amplifier's top view, highlighting its compact design and branding.
Informații de siguranță
Respectați întotdeauna următoarele măsuri de siguranță pentru a preveni vătămările corporale sau deteriorarea:
- Disconnect the vehicle's battery negative terminal before making any power connections.
- Ensure all wiring is properly routed and secured to prevent pinching or short circuits.
- Folosiți cabluri cu secțiunea corespunzătoare pentru conexiunile de alimentare și împământare, așa cum este specificat în secțiunea de instalare.
- Instalați ampîntr-un loc care permite o ventilație adecvată pentru a preveni supraîncălzirea.
- Evitați instalarea fișierului amplifier in areas exposed to moisture or excessive vibration.
- Consultați un instalator profesionist de sisteme audio auto dacă nu sunteți sigur de vreun aspect al procesului de instalare.
Configurare și instalare
1. Despachetarea și inspecția
Îndepărtați cu grijă amplifier from its packaging. Inspect the unit for any signs of damage that may have occurred during shipping. Contact your dealer immediately if any damage is found.
2. Montarea Ampmai în viață
Choose a mounting location that is dry, well-ventilated, and secure. Common locations include under a seat, in the trunk, or behind a panel. Ensure there is sufficient airflow around the ampradiatorul lifierului.
- Marcați găurile de montare folosind amplifier ca șablon.
- Drill pilot holes if necessary, being careful not to damage any vehicle components.
- Asigurați amplifizer folosind șuruburile de montare furnizate.
3. Conexiuni de cablare
Proper wiring is crucial for performance and safety. Refer to the following guidelines:
- Putere (BATT+): Connect a heavy-gauge wire (e.g., 4 AWG or 8 AWG depending on total power) directly from the positive terminal of the vehicle's battery. Install an inline fuse holder within 18 inches (45 cm) of the battery.
- Pământ (GND): Connect a heavy-gauge wire of the same size as the power wire to a clean, unpainted metal surface of the vehicle's chassis. Ensure a solid, low-resistance connection.
- Telecomandă (REM): Connect a smaller gauge wire (e.g., 18 AWG) from the amplifier's remote terminal to the remote output of your head unit. This turns the amppornirea și oprirea activatorului cu unitatea principală.
- Intrări RCAConectați cablurile RCA de la mufa preinstalată a unității principale.amp ieșiri către amplifier's RCA input jacks. Ensure correct channel matching (Front L/R, Rear L/R, Sub).
- Ieșiri difuzoare: Connect speaker wires from the amplifier's speaker terminals to your speakers. Observe correct polarity (+ to + and - to -). This is a 5-channel amplifier, typically 4 channels for full-range speakers and 1 channel for a subwoofer.
4. Gain, Crossover, and Bass Boost Settings
These settings allow you to fine-tune the amplifier's output to match your audio system and preferences.
- Obțineți controlul: Adjust the gain to match the output voltage of your head unit. Start with the gain at minimum, then slowly increase it until you hear distortion, then back off slightly. This is not a volume control.
- Crossover (LPF/HPF):
- Filtru trece jos (LPF): For the subwoofer channel, set the LPF to allow only low frequencies to pass (e.g., 80-120 Hz).
- Filtru de trecere înaltă (HPF): For the full-range channels, set the HPF to block low frequencies from reaching your main speakers (e.g., 80-100 Hz) to prevent distortion and improve sound clarity.
- Bass Boost: Use the bass boost sparingly. Excessive bass boost can lead to distortion and speaker damage. Adjust to taste, ensuring sound remains clear.
Instrucțiuni de operare
Odată instalat și configurat, amplifier will power on automatically with your head unit via the remote turn-on wire. Adjust volume and tone controls primarily from your head unit. The amplifier's settings (gain, crossover) are set during installation and generally do not require frequent adjustment.
Întreţinere
The DB DRIVE A3 2250.5 ampLifizer necesită o întreținere minimă.
- CuratenieȘtergeți periodic ampCurățați exteriorul aparatului cu o cârpă moale și uscată pentru a îndepărta praful. Nu utilizați substanțe chimice dure sau produse de curățare abrazive.
- Inspecţie: Occasionally check all wiring connections to ensure they are secure and free from corrosion. Ensure the amplifier's ventilation fins are not obstructed.
Depanare
Dacă întâmpinați probleme cu dvs amplifier, consultați următoarele probleme și soluții comune:
| Problemă | Cauza posibila | Soluţie |
|---|---|---|
| Fără curent / AmpLifierul nu se aprinde |
|
|
| Fără ieșire de sunet |
|
|
| Sunet distorsionat |
|
|
| AmpSupraîncălzirea lificatorului (Mod de protecție) |
|
|
Specificații
| Caracteristică | Detaliu |
|---|---|
| Numărul de model | A3 2250.5 |
| Putere maximă de ieșire | 1000 wați |
| Canale | 5-Channel (4 stereo, 1 mono for subwoofer) |
| AmpClasa mai vie | Clasa AB |
| Componente | Audiophile Grade |
| Dimensiuni (L x l x H) | 53.59 x 30.48 x 10.92 cm |
| Greutate | 6.53 kg |
| Managementul căldurii | DRIVESINK (Okur Series A3 feature) |
Garanție și suport
DB Drive products are designed for reliability and performance. This product is covered by a limited warranty. Please refer to the warranty card included with your product or visit the official DB Drive website-ul pentru termenii și condițiile detaliate ale garanției.
For technical support, service, or warranty claims, please contact your authorized DB Drive dealer or visit the DB Drive official website pentru informații de contact și resurse de asistență.